Monday, May 31, 2010

Baked Chicken Taquitos


My little brother, Jake, loves chicken taquitos. The boy can eat a whole plateful in a sitting (and he never gains a pound-punk . . . ) with jalapeno cheese dip and then is a happy camper. When I saw this recipe from Our Best Bites, I knew I had to try it, if only for my brother. Well, no surprise, these were absolutely amazing. They tasted just like the ones from the box, except they were more fresh-tasting and spicy and crunchy and delicious. Nick is adamant that these are his new number one. He has asked me at least 4 times since making them when I'm going to the store to get more cilantro so I can make them again. I also took some over for Jake to try and now my mom's asking me for the recipe because he liked them so much. The best part: if you have cooked shredded chicken, this dish comes together in a matter of minutes.

Baked Chicken Taquitos
**Makes 14-16 Taquitos
*From Our Best Bites

4 ounces cream cheese, softened
1/4 cup salsa verde
1 tablespoon lime juice
1/2 teaspoon cumin
1 teaspoon chili powder
1/2 teaspoon onion powder
1/4 teaspoon garlic powder
3 tablespoons chopped cilantro
1 green onion, thinly sliced (white and green parts, equal to 2 tablespoons)
2 cups shredded, cooked chicken
1 cup pepperjack cheese, shredded
Small yellow or white corn tortillas
Kosher salt
Cooking spray

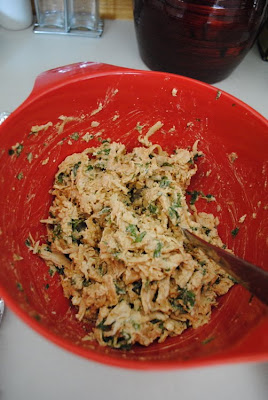
Preheat oven to 425 degrees. Cover a baking sheet with foil and spray with cooking spray. Mix the first seven ingredients together in a large bowl. Add the cilantro and green onion. Mix and add the chicken and cheese.
Place 3-4 tortillas between 2 damp paper towels and microwave 30-45 seconds, until they are soft and won't crack. Place 2-3 tablespoons of the chicken mixture on each tortilla, keeping it a 1/2 inch from the sides.

Roll up the tortillas as tightly as possible; use toothpicks if necessary. Place them seam side down on the baking sheet. Spray the tops lightly with cooking spray and sprinkle with KOSHER salt (makes a big difference, trust me).

Bake 15- 20 minutes or until crisp and the ends start to brown. Enjoy with restaurant style salsa!

Restaurant Style Salsa


This is yet another recipe from the Pioneer Woman. A month ago I made a GIANT batch of salsa roja, which required me to roast a massive amount of veggies. It took hours to create and make, especially since I had to do it in 4 batches in my food processor. My kitchen looked like a tomato bomb had gone off in it. This time it was MUCH easier and tasted better, in my opinion. The only change I made was in using two jalapenos instead of one. I like things spicy! This is a simple, restaurant style salsa that anyone with a food processor or blender can make and enjoy. Make this salsa and it will be a good day!

Restaurant Style Salsa
From The Pioneer Woman

1 28-ounce can whole tomatoes, drained (use Hunt's-they taste the freshest)
2 cans Ro-Tel tomatoes and peppers, drained (we use one can of original and one can of hot)
1/4 cup chopped onion
1 clove garlic, minced
2-3 whole jalapeno peppers, quartered and sliced thin
1/4 teaspoon sugar
1/2 teaspoon salt
1/2 heaping teaspoon cumin
1/2 cup cilantro, or more to taste (we use an entire bunch because we LOVE cilantro!)
1/2 large lime, juiced (or a whole small lime)

Combine all ingredients in a food processor. Watch the level of liquid from the Ro-Tel and whole tomatoes, so you don't have an overflow situation (unfortunately, I speak from experience . . . ). Pulse until it is the consistency you like, usually 10-15 pulses. I don't like big chunks in my salsa, so mine is pretty smooth. Test the seasonings and adjust as needed.

Important step: Refrigerate for at least one hour. This allows the flavors to marry and become even more delicious!

Restaurant style salsa and homemade chicken taquitos. YUM!

Crispy Yogurt Chicken


Okay, let me start out with this fact: Nick liked this dish. I wasn't the biggest fan. With all the flavors we infused in the yogurt, I expected more of this chicken. It just didn't deliver. However, the idea of dipping the chicken in seasoned yogurt instead of milk or buttermilk was great. The panko adhered very well to the sticky yogurt and the whole dish tasted a little like sourdough bread, which is good in my book. But I didn't get the garlic or the lemon that was in the yogurt, so on the whole, I was disappointed. I think I expect the most amazing dished from the Pioneer Woman, so my expectations were maybe (insanely) high. Not every dish can be a winner though. But, the good part: I will use this yogurt idea in the future. So score one there!

Crispy Yogurt Chicken
*From The Pioneer Woman

2 cups plan, unflavored yogurt
2-3 cloves of garlic, finely minced
Parsley to taste
Kosher salt to taste
1 whole lemon, juiced
Chicken tenderloins or breasts or legs, etc. (I used 10 tenders)
2 cups panko breadcrumbs
Butter-1 pat for each piece of chicken

Pour yogurt into a mixing bowl. Add minced garlic. Chop up some parsley and add to the mixture. Squeeze in some fresh lemon juice and stir to combine.

Rinse the chicken and pat dry. Sprinkle with salt. In another bowl, place breadcrumbs and season with salt. Butter a baking dish. With a pair of tongs, place the chicken one piece at a time in the yogurt mixture. Turn to coat thoroughly.

Then roll completely in bread crumbs and place in the baking dish.

Pace a slice of butter on each piece of chicken.

Cover with foil and bake in a 350 degree oven for 50 minutes. Remove the foil for the last 15 minutes of cooking time. Breadcrumbs should be nice and brown when done.

Friday, May 28, 2010

Perfect Potatoes Au Gratin


Nick stayed home from work today because he injured his knee last night at work. It's all bruised and swollen and when Nick's hurt, he's pretty much a big baby, so I offered to make him whatever he wanted out of my cookbook. He wanted au gratin potatoes and my recipe came from . . . wait for it . . . the Pioneer Woman! Are you shocked? These were good, also not surprising. The only problem was that I didn't have heavy cream, so I used 2 cups of half and half instead of 1 1/2 cups heavy cream and 1/2 cup whole milk. Next time I will get the cream, as I think it would definitely make it creamier. Still very, very good though!

Potatoes Au Gratin
*From the Pioneer Woman

4 whole russet potatoes, scrubbed clean
2 tablespoons butter, softened
1 1/2 cups heavy cream
1/2 cup whole milk
2 tablespoons flour
4-5 cloves of garlic, minced
1 teaspoon salt
Pepper to taste
1 cup sharp cheddar, grated

Check out my Nana's dish too!

Preheat oven to 400 degrees. Smear softened butter all over the bottom of a baking dish.

(Don't let your husband "soften" the butter, or it may look like this. He did redeem himself and manage to get it smeared over the dish eventually.)

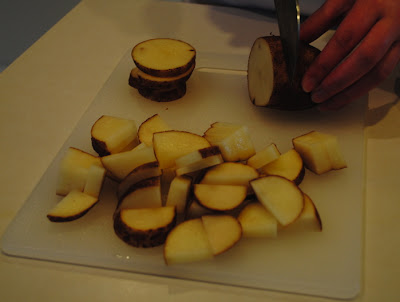
Slice off the ends of the potatoes and discard, then cut them into uniform medallions. Cut medallions into fourths.

In a separate bowl, whisk cream, milk, flour, minced garlic, and salt and pepper together.

Place 1/3 of potato mixture into the bottom of the baking dish and pour 1/3 of the cream mixture over the top. Repeat layers twice, ending with the cream mixture.

Cover with foil and bake 30 minutes. Remove foil and bake for an additional 20 minutes or until the potatoes are golden brown and bubbly. Add grated cheese and bake 5-10 minutes longer.

Let stand for a few minutes and serve. Enjoy!

Thursday, May 27, 2010

Molten Chocolate Cobbler


* Possible variation: Instead of 1 cup of melted chocolate chips, add in 1 cup of Nutella. Yum!

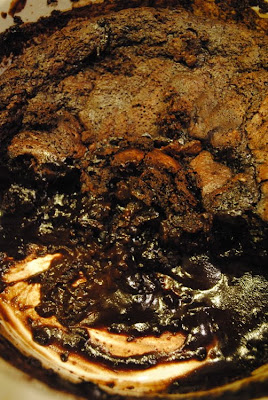
This was originally posted on the Tasty Kitchen section of the Pioneer Woman's blog. Shocking, I know. She's my go-to for good food nowadays. I originally made this at my parents' house a few days ago. I wanted to try it out and, not being much of a baker, I knew I'd get an honest opinion from my family about the dish. Nick's too nice sometimes (plus he loves everything and will eat anything. Kind of like a garbage disposal . . . ) and it's hard to get a truthful answer out of him at times. Anyway, I thought the original recipe was very good, but not chocolately enough for me. I need a really good dose of semi-sweet or dark chocolate richness for me to fall in love with a chocolate dish. And this just didn't quite have it. Enter the more confident "Chef" Stephanie. I added a generous cup of melted semi-sweet chocolate chips to the finished batter and adjusted the cooking time exactly 6 minutes. (Don't ask me why 6 and not 5 or 10. I'm weird.) The final product was molten and rich and the exact right kind of chocolately: not too sweet and very decadent. My entire house smells amazing right now! And it's so easy. Try this right now!

(Sorry for the quality of the photos. No natural light in my kitchen at 10pm!)

Molten Chocolate Cobbler
*Adapted from Tasty Kitchen and the Pioneer Woman

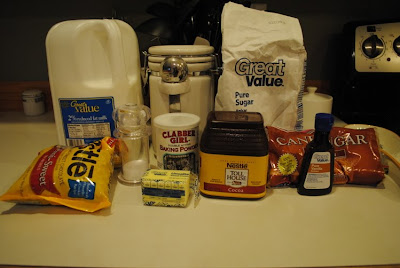
1 cup all-purpose flour
2 teaspoons baking powder
1/4 teaspoon salt
7 tablespoons cocoa powder, divided
1 1/4 cup sugar, divided
1/2 cup milk
1/3 cup melted butter
1 1/2 teaspoons vanilla extract
1/2 cup light brown sugar, packed
1 generous cup semi-sweet chocolate chips, melted
1 1/2 cup HOT tap water

Preheat oven to 350 degrees. Stir flour, baking powder, salt, 3 tablespoons cocoa powder, and 3/4 cup white sugar together in a large mixing bowl.

Stir in milk, melted butter, and vanilla. Mix until smooth. Add in melted chocolate and mix to combine.

Pour into ungreased 8x8 baking dish.

In a small separate bowl, mix remaining 1/2 cup sugar, brown sugar, and 4 tablespoons cocoa powder. Sprinkle the mixture evenly over the batter.

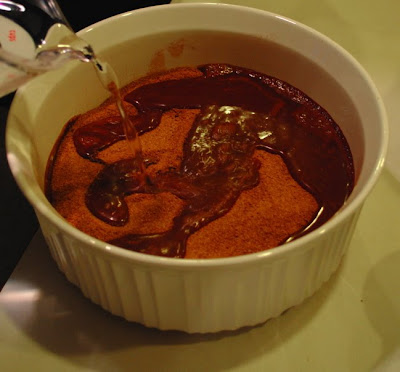
Pour hot tap water over it all. DO NOT STIR!

Looks strange, huh? But trust me, resist the urge to stir!

Bake 45-50 minutes or until the center is set. Serve with ice cream "to cut the sweetness." (Name that movie!)

Yeah, this is definitely as good as it looks. What are you waiting for? Go make it now!

And put a little whipped cream or ice cream on it while you're at it!

Baked Lemon Pasta


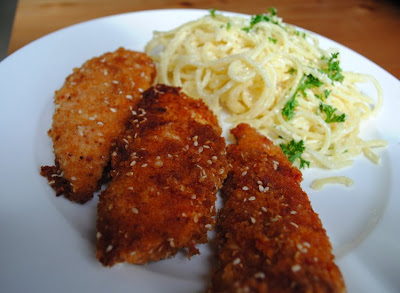
I have a secret. I don't really love red pasta sauce. It's okay and all, but I'd prefer a tomato cream, alfredo, or other creamy sauce. Yeah, I know it's way less healthy, but I like the creaminess! So when I found this recipe from the Pioneer Woman (that lady never fails to create the best recipes!), I knew that I had to try it. It was creamy and bright from the lemon and delicious. Add easy and fragrant and you've got quite a crowd pleaser! I was too busy making this sesame chicken to go with the pasta and so didn't get to take too many pictures, but trust me, it is GOOD! And if you want to see a whole slew of how-to photos, check the Pioneer Woman link!

Baked Lemon Pasta
*From The Pioneer Woman

1 pound thin spaghetti
4 tablespoons salted butter
2 tablespoons olive oil
2 cloves garlic, minced
1 whole lemon, juiced and zested
2 cups sour cream
1/2 teaspoon salt or to taste
Grated parmesan cheese
Chopped flat-leaf parsley
Extra lemon juice

Preheat oven to 375 degrees. Cook spaghetti to al dente. Meanwhile, in a skillet melt butter and olive oil over low heat. When it's melted, add the garlic then squeeze in the lemon juice. Turn off the heat and add in the sour cream. Stir the mixture together then add the lemon zest and salt. Taste and add more salt if necessary (a little less than a 1/2 teaspoon was plenty for me).

Pour the mixture over the spaghetti and stir together. Pour it into an oven-safe dish and cover with foil. Bake covered for 15 minutes. Remove the foil and cook it for an additional 7-10 minutes. When you remove the dish from the oven, squeeze more lemon juice over the top.

Then sprinkle with parmesan cheese and parsley and squeeze more lemon juice as needed.

Mmmm! Sesame chicken and baked lemon pasta. Is there a better meal? I don't think so!

Hearty (and Easy!) Lasagna


I loved this recipe because it didn't require any boiling of the noodles, which is always a time-consuming and messy step. You also don't need any special noodles to do this-just use regular lasagna noodles from any grocery store. One thing I did change about this recipe was the meat. I don't really care for ground meats, so I will almost always sub in shredded chicken when a recipe calls for ground beef. Sometimes I'll use ground turkey, but even then . . . I'm iffy. What can I say, I'm a picky eater! This recipe originally comes from Sing for Your Supper. Check the link for her original recipe. The major changes from me: the meat and the amount of salt. One tablespoon was way too much for me!

Easy, Hearty Lasagna
Adapted from Sing for Your Supper

3 chicken breasts roasted and shredded (I used a little onion and garlic powder in addition to the usual salt and pepper-layers of flavor baby!)
32 ounces of spaghetti sauce (one and a half jars usually)
1 1/2 cups water
2 cups ricotta cheese
2 cups mozzarella cheese, plus more for the top
1/2 cup grated parmesan cheese, plus more for the top
2 eggs
1-2 tablespoons dried parsley (or 1/4 cup fresh, chopped)
Salt and pepper (to taste)
2 cloves of garlic, minced
8 ounce package lasagna noodles, uncooked

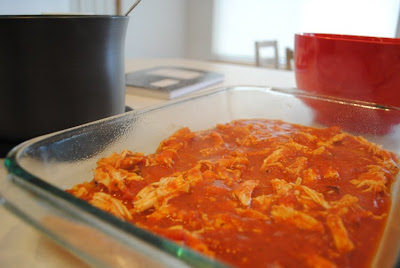
Preheat oven to 350 degrees. If you're using ground meat, brown it and drain off the fat. I just shredded up my chicken. Add to a large saucepan with spaghetti sauce and water. Simmer for 10 minutes and set aside. Meanwhile, combine ricotta, mozzarella, parmesan, eggs, parsley, salt and pepper, and garlic in a large mixing bowl. In a greased 9x13 pan pour approximately 1/2 cup of meat sauce (or enough to lightly coat the bottom of the dish).

Top with a layer of lasagna noodles and then 1 1/2 cups of meat sauce; spread half of the cheese mixture over the sauce (don't worry about mixing the layers a little bit-it's bound to happen!).

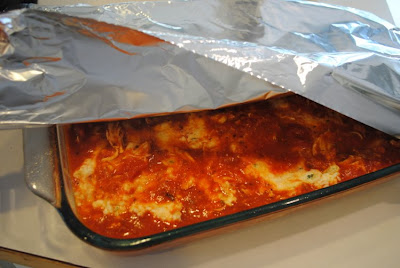
Repeat layers and top it with the remaining meat sauce. Cover with foil and bake 55-60 minutes.

Remove the foil and top with additional mozzarella and parmesan; bake uncovered for an additional 5-10 minutes. Let stand for at least 10 minutes before serving. This last step is important as it allows the juices to be soaked up a little bit more.

*I had some overflow issues with my casserole dish at the end of the covered baking time. To avoid a messy oven, put the casserole dish on top of a large baking sheet before putting it in the oven!

Stuffed Mushrooms


I served these on Mother's Day and they were a big hit. Nick begged me to make them again, so here they are! Incredibly easy and very tasty. This is also a flexible recipe. Add a little tabasco for a kick or some cooked sausage for some protein. Make it your own!

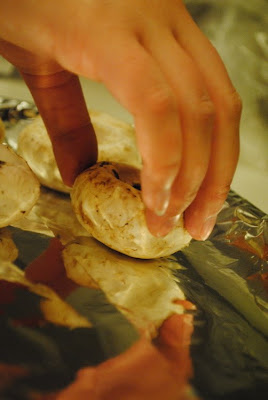
Nick even helped me stuff them! (Those are his big man hands.)

Stuffed Mushrooms

24 whole button mushrooms
3-4 cloves of garlic, minced
2 teaspoons vegetable oil
8 ounces cream cheese
1/4 cup grated parmesan cheese
1/4 teaspoon pepper
1/4 teaspoon onion powder
1/4 teaspoon cayenne (I left this out since I didn't have any cayenne . . . surprise!)
bread crumbs and minced fresh herbs

Preheat oven to 350 degrees. Grease a baking sheet with cooking spray. Clean the mushrooms with a damp towel and remove the stems.

Add stems and garlic to a food processor. Pulse in brief bursts until its all finely chopped.

Heat the oil in a skillet over medium heat. Add mushroom stem and garlic mixture and cook until the moisture disappears, about 5 to 7 minutes.

Lower the heat to medium-low. Stir in cream cheese, parmesan, and spices. Stir until smooth and creamy, then remove from heat. Fill each mushroom cap with a generous amount of filling.

Top with breadcrumbs and place on baking sheet. Bake 20-30 minutes or until hot and liquid forms under the caps. Garnish with herbs and serve immediately.