Sunday, December 11, 2016

Bang Bang Shrimp Pasta


Is there anything better than a quick, delicious recipe? Well, yes, of course there is, but still. I have an arsenal of quick 30-ish minute recipes for those days that Hubby has to work--and we have less than an hour to get him fed and out the door. This one just joined our permanent recipe file. It was a little sweet with just a little heat, and both my 5-year-old and 2-year-old loved it. You could also substitute chicken for the shrimp, if you'd prefer. But, shrimp. YUM. There are two changes I will make to the recipe next time I whip this one out (as I've already indicated in the ingredients): I wouldn't be sad if there were 2 pounds of shrimp, instead of 1 1/2. If shrimp is on sale, I'm going for 2 pounds. Also, with the delicious Thai flavor of the dish, a sprinkling of chopped scallions and peanuts would be amazing. Other than that, YUM. Do you have 30 minutes and a love of pasta, shrimp, and Thai food? Well then, make this.

Bang Bang Shrimp Pasta
*Slightly adapted from My Incredible Recipes

For the pasta:
1 pound of linguine
1 1/2-2 pounds medium shrimp, peeled and deveined
2 tablespoons olive oil
3 cloves of garlic, minced
1 tablespoon paprika
Black pepper to taste
1 tablespoon fresh chopped parsley

For the sauce:
1/2 cup of mayonnaise
1/2 cup Thai sweet chili sauce
2 cloves garlic, minced
2 tablespoons lime juice
1/4 teaspoon crushed red pepper flake
1 1/2 teaspoons onion powder

Toppings:
Chopped scallions
Chopped peanuts

Boil a large pot of salted water. Add noodles and cook until al dente.

Meanwhile, in a medium bowl, whisk together all the sauce ingredients and set aside. In another bowl, add the uncooked shrimp, garlic, paprika, and black pepper. Mix well. 

Add the olive oil to a large skillet on medium high heat. Cook the shrimp for about 6-7 minutes, or until no longer pink, stirring constantly. Remove from heat and add the cooked noodles and the sauce, tossing well. Add in the chopped parsley and give it one more toss. 

Serve topped with chopped peanuts and scallions and enjoy!

Sunday, July 31, 2016

Dill Pickle Dip

My husband loves dill pickles. We have SO many jars in the pantry, and we always seem to "need more" when we go to the store. Maybe this wouldn't be such a big deal, but I have a ridiculously small pantry and his collection of jars takes up a lot of space! So anyway, Hubby loves pickles. When I showed him this recipe, his response was, "YES. We need to make this." (I love that he says "we." We both know that I will make it, but he likes some credit, too. He grated the cheese, he's yelling at me.)

We only slightly adapted this recipe. It needed more pickles and I baked it for almost double the amount of time the initial recipe called for, then stuck it under the broiler to make it nice and brown. It was delicious, which warranted a blog post so I don't forget how we did it. You have to love pickles to enjoy this one, but if you do, this will be a huge hit! My whole family loved it!

Dill Pickle Dip
*Adapted from Lemons for Lulu

4 oz. cream cheese, softened
1 cup shredded Parmesan
1 cup mayo
3 garlic cloves, minced
1 1/2 cups dill pickles, diced
1 cup Panko breadcrumbs
1/2 cup shredded Parmesan
2 tablespoons melted butter

Preheat oven to 400º. Grease a 1 1/2 quart oval baking dish. Add cream cheese, Parmesan, mayo, garlic. and dill pickles to a food processor and pulse until just combined. Pour into the prepared baking dish.

Mix breadcrumbs, 1/2 cup Parmesan, and melted butter in a medium bowl and sprinkle over the dip. Bake for 25-30 minutes or until hot and bubbly. Pop under the broiler for a minute or two to brown the top and enjoy!

Wednesday, May 4, 2016

Bean and Bacon Soup

This is such a throwback to my childhood! I loved the bean and bacon soup in the red and white can. However, as an adult, when I tried that childhood favorite, I was sorely disappointed. So, I set out to make my own version of this warm and comforting soup. And I just have to say, the results are delicious! This is my all-time favorite soup to eat with grilled cheese sandwiches and my kids LOVE it. Seriously. The 1 1/2-year-old had two huge servings and the 4-year-old kept telling me how yummy it was. Score! 

This does take a few more steps compared to the canned version. But it is worth it. Trust me!

Bean and Bacon Soup

1 pound smoky bacon, cut into chunks*
1 onion, diced
3-4 stalks of celery, diced
3 carrots, diced
4 cloves garlic, minced
2 tablespoons flour
2 tablespoons tomato paste
5 cups chicken stock
2 bay leaves
4 cans great northern (or white) beans
Salt and pepper

In a Dutch oven, cook bacon chunks until crisp. Remove with a slotted spoon onto a plate lined with paper towels, then remove all but 2 tablespoons of bacon fat. To the bacon fat in the Dutch oven, add onion, celery, and carrots over medium heat. Season with salt and pepper and sauté for 8 minutes. Add garlic and cook an additional minute. 

Sprinkle in the flour, stir and cook for 2 minutes. Add tomato paste and cook another minute. Whisk in chicken stock, add bay leaves and cook on medium-low heat for 15-20 minutes. Meanwhile, in a small blender or food processor, mince your cooked bacon. This is optional, of course, but so worth it. Bacon bits in every bite!

Add the beans and bacon and simmer on low heat for 30 minutes. Taste for seasonings and remove the bay leaves. Serve in big bowls and enjoy! 

*Cook's Note: We've used low-sodium bacon and found it didn't have enough taste, so we added about 1/4-1/2 teaspoon liquid smoke at the same time as the chicken stock and that added the smoky flavor we were looking for.

Wednesday, April 27, 2016

One Pot Shrimp and Spinach with Orzo


I love it when we find a weeknight recipe that everyone likes and is easy to make. This particular one fits the bill in all those ways. From prep to table, this delicious shrimp dish took about 30 minutes, and I can't say enough about how yummy it was--for me, Hubby, and our girls. We will be including this one in our weekly meal plan over and over again, I have no doubt!

This started as a recipe on Buzzfeed. When I looked over the ingredient amounts, I felt like they were definitely off--especially if I wanted to feed my entire family, so I adjusted accordingly. The method is exactly the same, but this will feed 4 people easily. 

One Pot Shrimp and Spinach with Orzo
*Adapted from Buzzfeed 

4 tablespoons water
2 sticks butter, cut into pieces
3 teaspoons lemon zest (from 2 small lemons)
2 sprigs thyme
1 1/2-2 pounds shrimp, peeled and deveined
4 cloves garlic, minced
2 shallots, diced
2 cups orzo
4 cups chicken broth
Salt and pepper, to taste
4 cups spinach
Chopped parsley, for garnish

Over low heat, add water to a Dutch oven and slowly add the butter, a few pieces at a time, whisking constantly to make sure the water and butter combines and doesn't separate. Add the lemon zest and thyme springs and stir. Add the shrimp and poach for 8-10 minutes, until shrimp is fully cooked. Remove the shrimp and set aside. Discard thyme sprigs.

Add garlic, shallots, and orzo to the remaining liquid in the Dutch oven. Salt and pepper to taste and stir until all the liquid has been absorbed (this will only take a minute or two). Increase heat to medium-high and pour in the chicken stock. Cook, stirring frequently so it doesn't stick, until the orzo is al dente, about 9 minutes. Once the orzo is al dente, add the spinach and stir until just wilted. 

Remove from heat and serve the spinach and orzo topped with the shrimp and garnish with chopped parsley. Enjoy!

Sunday, January 3, 2016

Skillet Chicken Pot Pie


I am a huge fan of meals that can be made in one (or two) pots. The fewer dishes, the better! My least favorite kitchen chore is doing the dishes. In fact, when Hubby is on his weekend, the dishes are his job. He knows I hate doing them, but when he works, it's on me since he leaves right after we finish eating. One more reason I really, really look forward to his weekends!

This skillet chicken pot pie is a wonderful, one pot dish that is a huge crowd pleaser. When it comes out of the oven, it looks so yummy and amazing, you really feel like you've got a handle on the whole cooking thing. Look what I made! Look how pretty! It looks delicious and smells like heaven! Yep, it's a good one.

Skillet Chicken Pot Pie

12-inch cast iron skillet
3-4 cups cooked, shredded chicken
3 tablespoons olive oil
2 tablespoons butter
1 shallot, finely diced
5 cloves garlic, minced
6 sage leaves, finely chopped
1/3 cup flour
4 cups chicken stock
2/3 cup half and half
4 cups frozen veggies, thawed (I like a mix of carrots, peas, and corn)
Salt and pepper
1 sheet puff pastry, thawed
1 egg, beaten

Preheat oven to 425 º. Heat oil and butter in the cast iron skillet on medium-low heat. Add shallots and sauté for 3 minutes, then add garlic and sage and cook for 30 seconds. Add flour, stir to coat. (You can add a drizzle of extra oil here, if necessary). Cook for 2 minutes, stirring frequently. Add broth 1/2 cup at a time, whisking as you go. Whisk in half and half and season with salt and pepper. Increase heat to medium high and cook for 2 to 3 minutes to thicken. Add the veggies and chicken and simmer for 5 minutes. Taste for seasoning and add salt and/or pepper, as needed.

Unroll the thawed puff pastry onto the top of the skillet. Carefully pinch down the edges (the skillet is warm!) and brush with the beaten egg. Cut a few lines in the pastry sheet to vent. Bake for 15 minutes, then lower the heat to 375º and bake for 5-7 minutes longer until the top is nicely browned. Let it rest for 10 minutes, then slice and serve. Enjoy!

Our Favorite Chicken Noodle Soup

I try to be really good about meal planning at the beginning of every week. I think that things just go a bit smoother when I have an organized plan for meals. However, I sometimes fall a bit short on that goal. When that happens, we have a few go-to recipes that do the job on short notice, such as a simple chicken noodle soup that does the job when we are in a time crunch. It's just chicken, stock, carrots, celery, and pepper. Easy!

But, lately, we've been obsessed with this slightly more complicated version. It is so delicious and full of many layers of flavor. Even though you start with boxed stock, you add so much to the complexity of it that, by the end, you'll think you used homemade chicken stock. It's comforting and a little fancy (for chicken noodle soup, anyway) and completely delicious. It's our favorite chicken noodle soup recipe, hands down!

Our Favorite Chicken Noodle Soup

4 tablespoons butter
1 tablespoon olive oil
1/2 cup flour
1/2 yellow onion, diced
3/4 of a small bag of baby carrots (probably two cups worth), diced
5 stalks of celery, diced
Rotisserie chicken, shredded
2 boxes of chicken stock
4 cups water
1 1/2 tablespoons chicken base (or you could use chicken bouillon, but I really would recommend the chicken base)
3/4 teaspoon dried thyme
2 bay leaves
1 bag of Reames noodles (in the freezer section of your grocery store)
2 tablespoons chopped fresh parsley
Salt and lots of freshly cracked pepper

Melt butter and oil in a Dutch oven over medium heat. Sauté chopped onions, celery, and carrots with a pinch of salt and lots of pepper in butter and oil for 10 minutes. Sprinkle in the flour, stir, and cook for 2 minutes. Slowly whisk in 2 boxes of stock and bring to a boil. Add the bay leaves and thyme and reduce heat to medium-low and simmer for 20 minutes.

Add in 4 cups of water and chicken base. Season again with pepper. Add the noodles and bring to a boil. Boil for 10 minutes, then add the shredded chicken and cook for 5 minutes. Finally, add the parsley and taste for seasonings. I usually add more pepper at this point, but we love lots of pepper! Cook for 5 minutes more, then remove the bay leaves and serve. Enjoy!

Monday, November 16, 2015

Chicken Chow Mein


My husband LOVES Chinese food. He craves it like I craved beef and spicy food when I was pregnant with my girls. It's actually pretty funny, since all I have to do is say broccoli beef or fried rice or sweet and sour chicken or chow mein and he starts drooling, Pavlov's dogs style. When we stumbled across this recipe, I decided to add some shredded rotisserie chicken to it to make it a meal and we were all obsessed: me, Hubby, the 4-year-old, and the toddler. We now make this once every other week without fail. It is fast, easy, and completely delicious. I love having this chicken chow mein in my recipe arsenal, since it is always a hit!

There are a couple of important things to note in this recipe. The first is the yakisoba noodles. You can find those in the refrigerated section in your grocery store's produce section. The other is the ginger. The original recipe calls for grated fresh ginger. We tried it that way and thought that it made the recipe taste a little sweet, which we didn't like, so we use ground ginger. It has a spicier flavor that we love. These are just our preferences, so use what you like! 

Chicken Chow Mein
*Adapted from Damn Delicious

1 rotisserie chicken, shredded 
4 stalks celery, diced
1 yellow onion, diced
2-3 cups cabbage, chopped
2 packages yakisoba noodles, sauce packets discarded 
2 tablespoons canola or olive oil
Crispy chow mein noodles, optional

For the sauce:
1/3 cup soy sauce
4 cloves garlic, minced
1 heaping tablespoon brown sugar
1/8 teaspoon ground ginger
1/4 heaping teaspoon white pepper

In a small bowl, whisk together the sauce ingredients and set aside. Cook yakisoba noodles according to the package directions. We do ours in the microwave. You just poke a couple of holes in the packages and microwave them separately for a minute and 20 seconds, give or take (again, we've made this so many times that we have it down to a science). Once done, break up the noodles and set aside.

Meanwhile, heat canola oil in a large skillet on medium high heat. Add onions and celery and sauté for 6 minutes, stirring constantly. Add cabbage and sauté for 2 minutes. Add chicken and noodles and stir to heat through. Make a hole in the ingredients and pour in the sauce mixture. Remove from heat and gently toss the chow mein to get it all coated in the sauce. Serve immediately topped with crispy chow mein noodles (the ones in the blue can), if desired. Enjoy!

Sunday, October 11, 2015

White Chicken Chili

Since fall has finally come (sort of--it's supposed to be 70+ degrees this coming week--ugh), we are in full-on soup mode. I need it at least once a week for dinner. It's good for my soul! 

This particular recipe was something we made on a whim. I took a recipe I found online and modified it based on our tastes and what I thought would work a bit better. From prep to serving, it only took me 45 minutes, and it could easily be adapted to the slow cooker. Everyone enjoyed it--Hubs, the almost-four-year-old (on Wednesday!), and the almost-one-year-old (on Tuesday!). As for me, I didn't just like it, I loved it. I had two huge bowls, and, while I'm way too full, it was worth it. So, even though I didn't take a photo of this recipe, I'm blogging it because I NEED to. I need to have it on hand next time I need soup. You know, like next week!

White Chicken Chili
*Adapted from Food.com

3 chicken breasts or a whole chicken, cooked and shredded (rotisserie chicken is great for this!)
1 medium onion, diced
4-5 cloves garlic, minced
1 tablespoon canola oil
2 tablespoons flour
1 32-oz. box chicken stock
3 cans white beans (Great Northern), rinsed and drained
2 4-oz. cans diced green chilies
1 teaspoon oregano
1/2 teaspoon salt
1/2 teaspoon pepper
1/4 teaspoon cayenne pepper
1/4 teaspoon cumin
1 cup sour cream
1/2 cup heavy cream
Shredded pepper jack and crushed tortilla chips, for serving

In a Dutch oven on medium heat, sauté onions in oil for 8 minutes. Season with a pinch of salt and pepper. Add garlic and sauté an additional 30 seconds, then sprinkle on flour and cook for 2 minutes, stirring constantly. Slowly whisk in chicken stock and bring to a boil.

Add in green chilies, beans, salt and pepper, oregano, cayenne, and cumin and stir. Reduce heat to low and simmer for 15 minutes. Add in cooked, shredded chicken and stir. Simmer for an additional 15 minutes. Remove from heat and add sour cream and heavy cream. Stir to incorporate and then serve with shredded pepper jack and crushed tortilla chips. Enjoy!


Wednesday, September 3, 2014

Chicken and Dumplings


I love my family, especially my mom, who is one of the best cooks in the world, I swear. Nothing compares to some of her dishes for comfort and deliciousness. That said, because my dad wasn't an adventurous eater when we were growing up, my mom had a meat and potatoes philosophy when it came to dinner and had a number of meals that were on a permanent rotation. We didn't have onions or garlic in our food, unless it was the powdered form. Fortunately, Hubs and I are the exact opposite and really like to try new recipes with all kinds of ingredients-especially garlic and onions!

This recipe is one that I created because, although I didn't have chicken and dumplings growing up, Hubby did. Coming from a Ukrainian family meant that dumplings were a staple, according to him, and he really wanted chicken and dumplings a few weeks ago, so I obliged. We had a rotisserie chicken from Costco (the best kind of chicken for just about any dish) and Hubby didn't want carrots, so I used peas and celery and then chopped up the celery tops to add to the dumplings because I love, love, love the flavor of celery leaves. I've made this a couple of times since and I love it even more each time. It's even better the next day, which is really nice! The best part of the recipe is that it's easy to change it up. Add carrots or diced potatoes or any other veggies you like. We won't be changing it up much because we love it so much as is. Another permanent recipe dish, for sure!

Chicken and Dumplings

3-4 chicken breasts, cooked and shredded (or one large rotisserie chicken, shredded)
1 bunch of celery, with the tops
2 shallots or 1 yellow onion, finely diced
3 cloves garlic, minced
3 tablespoons butter
3 tablespoons flour
1 1/2 quarts chicken stock (1 1/2 boxes)
1/3 cup milk
Salt and pepper
1/4 teaspoon dried thyme
2 tablespoons cornstarch
2 tablespoons water
2/3 cup frozen peas

For the dumplings:
1 1/4 cups Bisquick
1/2 cup milk
1-2 tablespoons minced celery tops

Melt the butter in a large Dutch oven over medium heat. Chop up four ribs of celery and add to the pot with the onions and garlic. Season with salt and pepper and sauté for about 6 minutes, or until softened a bit. Whisk in flour and cook for 1-2 minutes, whisking constantly. Add stock and bring to a boil, whisking to remove all the yummy bits from the bottom of the pot. Boil for 5 minutes.

Reduce heat to medium-low and add milk, thyme, and salt and pepper to taste and cook an additional 5 minutes. Make a slurry with the cornstarch and water and whisk into the broth, then add chicken and peas. Heat through for a few minutes while you make the dumplings.

For the dumplings: Mix Bisquick, milk, and chopped celery tops together in a medium bowl. Gently spoon the mixture by tablespoonfuls on top of the chicken stew. Cover the pot and gently steam the dumplings on the stovetop on low heat for 20 minutes until firm and puffed. Spoon into bowls and enjoy!

Monday, August 18, 2014

Beef Stew in a Red Wine Sauce

A terrible photo of an absolutely amazing meal!

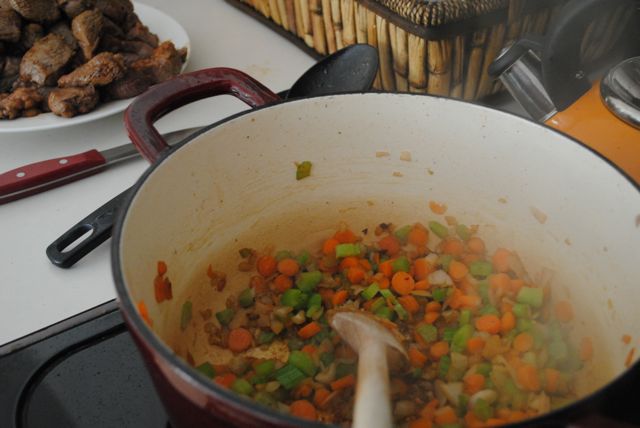
I have been very lucky this pregnancy, in that I have been able to cook and enjoy it almost the entire time (the first few months were a bit iffy!). I'm also lucky to have a husband that LOVES food and gets really, really excited about trying new recipes and techniques. He's a great help in the kitchen, too. This recipe was definitely one that required an extra set of hands because of all the steps--and because I'm eight months pregnant and the size of a duplex, so I don't move very fast!

In terms of work, this particular recipe is really up there, but the end result is worth it a thousand times over. Every flavor was amazing, every component was worth the work it took, every bite was heaven. Sometimes a dish is just so perfect that you can't help but smile when you eat it (and maybe your eyes roll back in your head a bit--I'm not saying mine did, but . . . yeah, they did). Because we changed the second part of this recipe so much, I wanted to make sure that I blogged it so we won't forget exactly what we did. I'm eventually going to make a family recipe book, which will include our favorite dishes. This one will absolutely be in that book--with a much better set of photos! My push present for this baby is going to be a new camera and lens--thanks, Hubby! Anyway, here is the beef stew in a red wine sauce in all its delicious glory!

Beef Stew in a Red Wine Sauce
*Adapted from Jacques Pépin

First phase:

3 tablespoons olive oil
3 pounds beef stew meat, cut in 2 inch chunks
Salt and Pepper
1 yellow onion, finely diced
4 cloves garlic, finely minced
2 tablespoons flour
1 bottle dry red wine**
2 bay leaves
1 thyme sprig

**We used Costco's Kirkland Signature Côtes du Rhône, which was inexpensive and yummy. For more sauce, I might use a bottle and a half next time.

Preheat the oven to 350º. In a Dutch oven, heat the olive oil over medium high heat. Generously season the meat with salt and pepper and brown in a single layer (you'll need to cook it in batches), about 3 minutes per side. Remove the meat, place on a plate, and set aside. Lower the heat to medium and add a little more olive oil, if necessary. Add onion and garlic and sauté until the onion is soft, about 5 minutes. Add the meat and any juices on the plate back into the pot and sprinkle with flour. Stir to coat the meat, then pour in the red wine. Add the bay leaves, thyme, and salt and pepper and bring to a boil, stirring to incorporate all the delicious brown bits on the bottom of the pot. Cover and place in the oven. Cook for 2 hours, or until the meat is fork tender.

Second phase:

1 package of bacon, cut into 1-inch pieces
1 yellow onion, finely diced
15 baby bella mushrooms, diced
15 baby carrots, diced
Salt and pepper

Sauté bacon in a large skillet until cooked through and a bit crispy. Remove and place on a plate with paper towels and set aside. Drain off all but 1-2 tablespoons of the bacon fat and add onion, mushrooms, and carrots. Season with salt and pepper and cook over medium heat, stirring constantly for about 15 minutes, or until the veggies have softened and the mushrooms have released their liquid.

To serve:

Add a healthy dollop of mashed potatoes to a bowl. Place a few delicious pieces of super tender meat on top of the potatoes, then sprinkle on some bacon and a generous amount of the veggies. Top with the red wine sauce and enjoy every blissful bite!

Saturday, December 7, 2013

CrockPot Honey Bourbon Chicken

Instagram has become my saving grace for getting food photos in the early darkness of winter!

We are so over holiday food. After Thanksgiving, we ate leftovers for a week, so if I don't see another turkey again until next year, I'd be really happy. Hubs and I have been craving Asian food for the last few weeks, so I thought I'd try something new to satisfy the craving. I am always a bit hesitant when it comes to teriyaki-style chicken in the CrockPot with honey in the recipe. I have tried a few of these recipes and it always comes out too sweet. So, when I saw this particular recipe, I was really nervous. But it sounded good and I had all the ingredients, so I committed. I cut back on the honey a bit, which made it just about perfect. This wound up being a huge hit! It's in my permanent recipe file, as per Hubby's request. Please don't leave out the toasted sesame seeds and chopped green onions; they really made the dish.

HUGE bonus: The two-year-old was a big fan, too! Lately, she's been all about oranges, carrots, and bananas, so it was great to see her scarfing down the chicken. The toasted sesame seeds were a big selling point, of course!

One more note: Despite the name, this dish does not have any bourbon in it. You could add some if you like, but it's not in the original recipe-and I didn't have any, so it worked out!

CrockPot Honey Bourbon Chicken
*Adapted from Real Mom Kitchen

4 chicken breasts (I used frozen, because that's what I had on hand)
Kosher salt and pepper
1/2 cup finely diced yellow onion
3 garlic cloves, minced
3/4 cup honey
1/2 cup soy sauce
1/4 cup ketchup
2 tablespoons canola oil
1/4 teaspoon crushed red pepper flakes
1-2 tablespoons of cornstarch
1-2 tablespoons water
Cooked rice
Chopped green onions
Toasted sesame seeds

Place chicken in CrockPot and season with salt and pepper. Sprinkle chopped onion on top of chicken. Mix garlic, honey, soy sauce, ketchup, canola oil, and crushed red pepper flakes in a medium bowl. Pour the mixture over the chicken. Cover and cook on low for 3-4 hours. (My chicken was frozen, so I cooked it on high for about 4 hours.)

When the chicken is cooked and comes apart easily with a fork, remove from CrockPot and shred. Set aside. In a cup, combine one tablespoon cornstarch with one tablespoon water. Pour into sauce and stir. If it's not thick enough, repeat with an additional tablespoon of cornstarch mixed with a tablespoon of water.

Place the shredded chicken back in the sauce and stir to coat. Serve over rice with chopped green onions and toasted sesame seeds. Enjoy!

Thursday, October 31, 2013

Sweet Potato, Caramelized Shallot, and Goat Cheese Tart

Oh, so good. So, so good!
 Hubby and I are on a healthy, whole foods kick. We purchased a quarter of a cow from one of his co-workers, who has a beef farm, which resulted in 175 pounds of organic, grass-fed beef filling our freezer. We are splitting it with my parents, but I can't tell you how excited I am to see all that wonderful meat! It was really cost-effective too, when you broke it all down.

In addition to our beautiful quarter beef, we have started using Full Circle produce. They deliver a box of certified organic produce to our front door once a week. Now, I am NOT one of those it-must-be-organic-or-I'm-going-to-freak-out types, but it is really exciting to get such good, local produce (I am a big proponent of eating local!) at such a great price. And delivered to our door, no less! The best thing about it is that we are being forced to cook outside the box, figuratively speaking. Just this week, we got a pie pumpkin, a bunch of kale, yams, an avocado, shallots, valencia oranges, persimmons, and fuji apples. We found out that persimmons are yummy! And I sautéed some kale with red pepper flakes, garlic, and balsamic vinegar. It was delicious!

The best thing I've made with some of this amazing produce was a sweet potato, caramelized shallot, and goat cheese tart. I actually cheated and made it the day before we got the box of produce because I had a bunch of sweet potatoes, but I'm sure it will be just as good when I make it again with the yams! This is my favorite thing I've made in a long time. Hubs enjoyed it, but he's a meat lover, so this vegetarian dish wasn't in his top 5. It was definitely in mine though! I can't even begin to describe how yummy it was, and although a bit labor intensive, the results are SO worth it. Thank you to Full Circle for posting this recipe, which I will be using for the rest of my life. I swear. The only change I MIGHT make would be to sprinkle some crumbled bacon on top. Because everything is better with bacon. Maybe.

Oh, and I apologize for the poor quality of the photos. It was 7:30 when I started it, so it didn't get done until around 9. 9pm in the fall=crummy light!

Sweet Potato, Caramelized Shallot, and Goat Cheese Tart
*From Full Circle

3 tablespoons extra virgin olive oil
1/4 cup finely chopped shallots
1 1/4 pounds (2 medium) sweet potatoes or garnet yams, peeled and thinly sliced (we used a mandolin)
1 teaspoon fresh thyme, coarsely chopped
Salt and pepper
1/2 cup grated Parmigiano-Reggiano
1 cup goat cheese, crumbled
2 strips cooked bacon, crumbled (optional)

Preheat oven to 400º.  In a medium saucepan, heat oil oer medium-high heat. Add shallots and sauté until soft, about 3 minutes. Spray a 10-inch tart pan with non-stick spray (we used our Misto) and place it on a foil-lined baking sheet.

Place sweet potatoes or yams in overlapping layers, starting at the outer edge and spiraling inward to make one layer. Sprinkle some shallots, thyme, Parm, goat cheese, salt and pepper, and repeat the process to create 3 layers.

Cover the top of the tart with crumbled bacon, if you're using it (I'm still on the fence about the bacon), and any remaining cheese (I set aside some Parm so I had plenty to sprinkle on top), then very lightly salt.

Bake until the top is golden brown and the potatoes are easily pierced with a fork, about 40-45 minutes. Remove and cut into wedges to serve. It also reheats really well the next day. Enjoy!

Thursday, October 17, 2013

Broccoli Cheese Soup


I used to hate broccoli. Like I had a true, honest, complete HATRED for broccoli. It's nasty, I can't stand the taste, I don't want to eat mini trees . . . and on and on and on. It was pretty dramatic-and ridiculous. I have since seen the error of my ways and now I LOVE broccoli. We buy the giant bags of florets from Costco and use it up within two weeks. Broccoli in everything! This soup, in particular, is a family favorite. I wrote down the recipe and have reworked it over and over again until it is perfect-at least in our opinion. The notebook page it's on is covered with mashed broccoli bits, dried cheese, and splashes of milk-all signs of a well-used recipe! My husband is a huge fan and claims that it is just as good as Chili's, which is really, really high praise coming from a self-proclaimed broccoli cheese soup aficionado.

I know that 8 cups of chopped broccoli is a lot, but that is the way we like it--with lots and lots of broccoli! We have made it with 5 cups of chopped broccoli, 2 cups of half and half, 3 cups of chicken stock, and 3 cups of shredded cheese, but my family likes it as written below. My 6-year-old is so excited to take the leftovers to school for lunch in her thermos. She inhaled two huge servings tonight! If you ask her, she will tell you that Mom's broccoli cheese soup is her favorite meal. That's a win in my book!

Broccoli Cheese Soup

2 shallots, finely diced (or one small yellow onion)
4-5 cloves garlic, chopped
5 tablespoons salted butter
1/2 cup flour
3 cups half and half
4 cups chicken stock
1 cup milk
8 cups chopped broccoli florets (from about 7 broccoli crowns)
Kosher salt and cracked black pepper
4 cups shredded cheddar cheese (sharp or extra sharp is best)
1/4 teaspoon nutmeg

Melt the butter in a large stock pot or Dutch oven. Add onion and season lightly with salt and pepper. Sauté on medium heat about 5 minutes, until translucent. Add garlic and cook for 1 minute, then add flour and cook 2 minutes.

Slowly whisk in half and half, milk, and chicken stock. Simmer on medium low heat for 20 minutes.

Add broccoli and nutmeg and season with salt and pepper, to taste. Simmer on medium low heat for 30 minutes or until broccoli is fork tender.

Using an immersion blender, blend the soup for a few minutes to your desired consistency, or, alternately, use a blender and purée half the soup, then add it back to the pot. Bring the soup back up to temp and add the cheese. Once the cheese is melted, it's ready to serve with some extra cheddar sprinkled on top. Let's face it, this is not a healthy recipe, so go nuts with the cheese! Enjoy!

Wednesday, September 11, 2013

CrockPot Buffalo Chicken Tacos

Spicy, Buffalo-wingy goodness right there!
My husband loves all things Buffalo. As in the wings, not the city. I've seen him put Buffalo sauce on just about anything, sometimes to the point of making me gag. So, I thought he would be really excited about these tacos when I pitched him the idea last night while he was at work.
"Eh, okay," he says.
"REALLY? That's all the excitement I get for BUFFALO chicken tacos?"
"It's just that we have tacos all the time . . . "
Hmm, he does have a point. Tacos are my go-to meal when I can't come up with anything more creative. "But these have BUFFALO sauce!"
"Okay, we can try them," his final answer.
GRRR.

I made them anyway because, let's face it, I can't come up with elaborate, time-consuming meals every stinkin' day, so Buffalo chicken tacos were happening. Well, his immediate response after the first bite solidified my genius:
"You were SO right! I will never doubt you again. Oh my gosh, so good!" Yes, that is what he actually said. I'm right. Of course, haha! Never doubt the wife!

Now I'm going to bask in the glory of my husband telling me I'm right (I am almost always right, but he rarely admits it) while I attempt to clean the Buffalo sauce off of every surface in my kitchen.

Oh, and if you like Buffalo sauce, try this one. It's definitely a keeper in our house!
Being right sure looks good.


CrockPot Buffalo Chicken Tacos

3-4 boneless, skinless chicken breasts (I used frozen and it worked great!)
1/4 teaspoon pepper
3/4-1 cup Frank's RedHot Buffalo Wing Sauce (I used 1 cup with 3 breasts, 3/4 cup would have been plenty)
3 tablespoons melted butter
Corn tortillas
Oil for frying
Chunky blue cheese dressing
Coleslaw mix
Green onions, chopped
LOTS of napkins!

Spray your crock with oil-I use a Misto with olive oil, but Pam would work fine. Place chicken breasts in the crock and sprinkle with black pepper. Mix Frank's RedHot and melted butter together and pour over the breasts. Cover and cook on low for 4-6 hours, or until chicken shreds easily with a fork.

Remove chicken from the CrockPot and shred with two forks. Put the chicken back into the hot sauce mixture and stir. Turn to high and leave the lid off for 10 minutes. The chicken will be very juicy and doesn't thicken much, hence the need for lots of napkins!

Meanwhile, heat the oil in skillet and quick fry your tortillas. We use a cast-iron skillet on medium heat and do about 30 seconds a side. You could also use flour tortillas, if you don't want the mess and hassle of frying.

Serve tacos with coleslaw, chunky blue cheese dressing, and chopped green onions. Enjoy!

Wednesday, August 28, 2013

Buffalo Ranch Roasted Chickpeas

Mmm, buffalo ranch roasted chickpeas!
Some days you just need buffalo sauce. Seriously. Your taste buds just cry out for that spicy, vinegary heat. However, cooking chicken wings and coating them in butter and buffalo sauce isn't always an option (hello, unhealthy MESS!), despite what Hubby might say. (One of his all-time favorite dishes is buffalo wings.) This particular snack is fun, easy, and yummy. I think it's perfect for football season, as long as you don't make more than you're sure you will need. While these come out of the oven nice and crispy, they don't stay that way, and don't make good leftovers-at least if the crispiness is something you need. However, I like them the next day, since they are still spicy and yummy.

Happy, happy, happy!


Buffalo Ranch Roasted Chickpeas
*From Kid Tested Firefighter Approved

2 cups cooked chickpeas (or one can, drained, rinsed, and patted dry)
3 tablespoons Frank's Red Hot Sauce
1/4 teaspoon lemon juice or apple cider vinegar
1 tablespoon nutritional yeast (I omitted-I didn't have any)
1/2 teaspoon onion powder
1/2 teaspoon garlic powder
1/4 teaspoon black pepper
1/2 teaspoon dried dill
2 tablespoons dried parsley

Preheat oven to 400º. Combine chickpeas, hot sauce, and lemon juice in a bowl. In a separate bowl, mix the spices together. Add spice mixture to the chickpeas and stir to combine.

Line a baking sheet with foil or parchment paper. Pour chickpeas onto it and spread out in a single layer. Bake for 35-50 minutes, stirring every 15 minutes, until lightly browned. Enjoy!

Sunday, August 18, 2013

Blackberry Cobbler

Blackberry cobbler and ice cream are the perfect combination!

I have a confession to make. I used to hate blackberries. My mom would make blackberry pie and I would turn up my nose. Too many seeds! Not sweet enough! I don't like pie! (To be completely honest, I still don't like pie very much. Crust is just really not my thing.) Maybe it was the seeds. Maybe it was the child labor involved to harvest the berries. Maybe it was the scratches from the thorns and the bee stings. I really don't know where the dislike started, but I have since changed my mind about blackberries. They are plump, juicy, and delicious, especially in this cobbler.

Hello, Delicious!

The cobbler topping on this was so good. We sprinkled some raw sugar (turbinado sugar) on top before baking, so the topping ended up soft and pillowy in the middle with a slightly crunchy top layer from the sugar. Perfection. The first time I made this, we used too many blackberries (7-8 cups instead of 6) and it didn't thicken up well. We made it again, and were careful to use only 6 cups of berries, and it turned out perfectly. This is a great summertime dessert-and a perfect Pacific Northwest treat!

Blackberry Cobbler
*Adapted from Tasty Kitchen

1 1/2 cups flour
1 1/2 cups sugar, divided
1 1/2 teaspoons baking powder
1 teaspoon salt
9 tablespoons cold, unsalted butter
1/3 cup boiling water
3 tablespoons cornstarch
1/3 cup cold water
1 1/2 tablespoons lemon juice
Zest from one lemon
6 cups fresh blackberries, rinsed and drained
1-2 teaspoons turbinado sugar

Preheat oven to 400º. In a large bowl, mix flour, 3/4 cup sugar, baking powder, and salt. Cut the butter in pieces and use a pastry cutter or two forks to cut it into the flour mixture, until it resembles coarse crumbs. Stir in the boiling water until the mixture is just evenly moist. Set aside.

In a large bowl, dissolve the cornstarch in cold water.  Add the berries, remaining 3/4 cup of sugar, lemon juice, and lemon zest. Transfer to a skillet and bring to a boil, stirring frequently. Allow to boil for about 5 minutes, or until it starts to thicken. Transfer to a baking dish (I used a 9x11 oval baking dish and it worked perfectly). Drop the dough on top by spoonful and sprinkle turbinado sugar over the top.

Bake 25 minutes, until dough is golden brown. Enjoy with a generous scoop of ice cream!
Yes, this smells as good as it looks!

Monday, August 5, 2013

Our Favorite Salsa

Best salsa EVER!
This is far and away the best salsa I've ever had and I don't have to go anywhere special to get it, which I love! You could easily use fresh tomatoes, when in season, but Hunt's canned tomatoes are delicious and very, very fresh tasting. This might be one of the easiest recipes I make, but it is always a crowd pleaser!

I have blogged this salsa before here, but I felt like it merited another post. I make this at least once a month and even more frequently in the summer. Hubby's co-workers request it and so do our friends any time we're going to a potluck or BBQ. I've had quite a few requests for the recipe lately, so I though that this would be a good chance to write about it again and (hopefully) get a better photo of it. So, here it is again. Enjoy!

Our Favorite Salsa
*Slightly adapted from The Pioneer Woman

1 28-oz. can Hunt's whole tomatoes, drained (or 2 14.5-oz. cans)
2 cans RoTel tomatoes and peppers, drained (you can use any combination of mild, medium, or hot)
1/2 medium white onion, chopped
1 clove garlic, minced
2-3 whole jalapeños, quartered and thinly sliced (remove ribs and seeds to lower the level of spiciness)
1/4 teaspoon sugar
1/2 teaspoon kosher salt
1/2 heaping teaspoon cumin
1 bunch of cilantro, stems removed
1/2 lime, juiced or 1 1/2 teaspoons of lime juice

Add all ingredients to a food processor and pulse until you reach the desired consistency. Taste to test for seasoning. Add more sugar or salt, as necessary-I usually add a small pinch more of each.

Refrigerate for at least one hour to allow flavors to marry. Enjoy!

Sunday, August 4, 2013

Steak and Mushroom Pot Pie

Hubs has been working a lot of overtime lately, so he decided to take a few days off last week. We had 6 glorious days in which I didn't have to worry about him or do the mostly-single parent thing; it was amazing. We spent lots of family time together, which was great. We went hiking, garage sale-ing, and checked out a few of the local street fairs. Our area also boasts the largest Scottish Highland Games this side of the Mississippi, which just happened to be on the weekend Hubs took off.

If you've never gone to a Highland Games event, you should. It was so much fun! There were bagpipers, dancers, dogs, clan booths, and yummy food. I mean REALLY yummy food. Hubs tried haggis (here's an explanation of what haggis is). Em tried it too, and really liked it. Because all 21-month-old toddlers like haggis. She's an odd little duck! I tried it too, but I was much more excited about my steak and mushroom pot pie. Fall-apart meat and mushrooms in a rich, hearty gravy topped with a puff pastry crust. Yep, doesn't get much better than that! I promised Hubs that I would try to replicate it as soon as possible. It was that good. Well, today I found a recipe that seemed very promising and with just a couple of very small tweaks, I made something that we absolutely loved. This one goes in the permanent recipe file, for sure. And, all in all, it was pretty darn easy too!

Steak and Mushroom Pot Pie
*Very slightly adapted from Simply Delicious

2 tbsp butter
2 tbsp olive oil
3 1/2 pounds stew beef (or cut chuck steak into chunks, bone removed)
2 shallots, diced
3 carrots, diced
2 stalks celery, diced
8 ounces mushrooms, sliced
3 cloves garlic, diced
2 tsp smoked paprika
1 tsp dried thyme
1 tsp dried rosemary
1 tsp dried oregano
Salt and pepper
2 bay leaves
2 cups beef stock
1 tbsp worcestershire sauce
1 tbsp cornstarch
1/4 cup milk
2 sheets puff pastry, thawed
1 egg, beaten

Melt butter and olive oil in a large Dutch oven over medium-high heat. Brown the beef in batches, making sure not to crowd the pot; season each batch with salt and pepper. This takes between 3-5 minutes total, per batch.

In the same pot, sauté the carrots, celery, and onion until soft and fragrant, about 10 minutes, making sure to scrape up all the yummy bits from the bottom of the pan. 

Add in the garlic and mushrooms and sauté for 8 minutes. Then add the paprika, thyme, rosemary, oregano, bay leaves, and salt and pepper, to taste. Stir well.

Add the beef back into the pot, juice and all. Pour in the stock and stir to combine. Reduce heat to low. Cover the pot and allow it to simmer gently for 1 1/2-2 hours.

Preheat the oven to 355º. 

When the meat is very tender (it falls apart easily with a fork), add worcestershire sauce and taste for seasoning. Add more salt and pepper, if necessary. Turn up the heat to medium-high. Whisk together the cornstarch and milk, and pour this mixture into the pot. Simmer rapidly to thicken, about 10 minutes.

Butter the bottom and sides of a large baking dish. Press one sheet of puff pastry into the bottom of the dish and up the sides. Pour in the beef mixture. Top with the second sheet of puff pastry and pinch the edges together with the bottom sheet. Brush with beaten egg and cut two slits in the top.

Bake for 35-40 minutes, or until the pastry is browned. Enjoy!

Monday, July 29, 2013

Honey Curry Chicken (2 Ways!)

Thank goodness for Instagram! One quick photo and then this was devoured!

I've made this dish a few times (and blogged it here) and we enjoy it every time, but it wasn't exactly right. Sometimes you just need to leave well enough alone, but this recipe was one that I wanted to perfect. So, I made a few changes and it was a huge hit! There are now a few more steps, but I'm also going to include instructions for the slow cooker, which is incredibly easy-and a good way to go when you get busy and don't have any thawed chicken breasts on hand. Like me, most of the time.

Even if you haven't tried curry, this is a dish that anyone will like. It's flavorful, it's savory, it's a little sweet, and it's delicious. Definitely a permanent recipe file dish for us!

Honey Curry Chicken (2 Ways!)
*Adapted from Fix-It and Forget-It Cookbook

4 tablespoons butter
3/4 cup honey
1/2 cup mustard
1/4 teaspoon salt
2 teaspoons curry powder
1 tablespoon coconut oil
4-5 chicken breasts, cut into 1-inch cubes
Salt and pepper
Cilantro

Preheat oven to 350º. Melt 1 tablespoon coconut oil in a large skillet. Add cubed chicken, season with salt and pepper, and sauté for about 5 minutes, or until beginning to brown.

Meanwhile, mix honey, mustard, salt, and curry powder together in a medium bowl. In a small saucepan, melt butter and add honey mixture, stirring to combine. Keep warm while chicken is cooking.

Once the chicken has begun to brown, pour honey curry mixture on top and stir to coat. Put the skillet in the oven and bake for 10-15 minutes, stirring once or twice, or until chicken is cooked through. Serve over jasmine rice and top with cilantro.

CrockPot Directions:

Spray your crock and add 4 frozen chicken breasts. Season with salt and pepper. In a small saucepan, melt butter and coconut oil. Add mustard, honey, salt, and curry powder. Stir to combine and warm through. You're not cooking this sauce, just warming it a bit so it all combines smoothly.

Pour sauce over chicken, cover and cook on low for 5-6 hours or on high for 4. I usually turn the chicken once during the cooking process, but it probably isn't necessary. The chicken is done when it shreds easily with a fork-in other words, it will basically fall apart in delicious ways!

Shred the chicken. Make a slurry of 1 tablespoon cornstarch and 1 tablespoon water. Whisk into the sauce and repeat if necessary to thicken (one time has always made it the perfect consistency for me). Add your shredded chicken back in and stir to coat. Serve over jasmine rice and top with cilantro.

Enjoy!

Wednesday, March 27, 2013

Savory Skillet Lamb Chops and Mashed Sweet Potatoes

Savory Skillet Lamb Chops
*From Cooks.com

2 tsp. olive oil
5 lamb loin shanks
1/4 tsp. kosher salt
1/8 tsp. pepper
1/2 tsp. oregano
1/2 tsp. onion powder
1/4 tsp. garlic powder
1 tsp. lemon juice
1/3 cup water

Slowly heat olive oil in skillet with a lid. Add chops and brown for 2 1/2 minutes on each side. Add the rest of the ingredients to 1/3 cup water. Mix well and pour it over the chops. Bring to a boil, reduce heat and simmer covered for 40 minutes, or until chops are tender. Remove chops and allow to rest for 10 minutes. Increase heat to thicken the liquid to a make a gravy, which should take 2-3 minutes.

Mashed Sweet Potatoes
*From Paula Deen

3 large sweet potatoes, peeled and chopped into 1-inch cubes
1/4 cup butter
3 tbsp. honey
1/4 tsp. ground cinnamon
1/4 tsp. kosher salt

Add potatoes to a large pot and cover with water. Add a dash of kosher salt. Bring to a boil over medium-high heat and boil for 8-10 minutes or until potatoes are tender. Drain and return potatoes to the pot. Add butter, salt, cinnamon, and honey. Beat with an electric mixer until smooth. Serve hot. Enjoy!