Wednesday, August 28, 2013

Buffalo Ranch Roasted Chickpeas

Mmm, buffalo ranch roasted chickpeas!
Some days you just need buffalo sauce. Seriously. Your taste buds just cry out for that spicy, vinegary heat. However, cooking chicken wings and coating them in butter and buffalo sauce isn't always an option (hello, unhealthy MESS!), despite what Hubby might say. (One of his all-time favorite dishes is buffalo wings.) This particular snack is fun, easy, and yummy. I think it's perfect for football season, as long as you don't make more than you're sure you will need. While these come out of the oven nice and crispy, they don't stay that way, and don't make good leftovers-at least if the crispiness is something you need. However, I like them the next day, since they are still spicy and yummy.

Happy, happy, happy!


Buffalo Ranch Roasted Chickpeas
*From Kid Tested Firefighter Approved

2 cups cooked chickpeas (or one can, drained, rinsed, and patted dry)
3 tablespoons Frank's Red Hot Sauce
1/4 teaspoon lemon juice or apple cider vinegar
1 tablespoon nutritional yeast (I omitted-I didn't have any)
1/2 teaspoon onion powder
1/2 teaspoon garlic powder
1/4 teaspoon black pepper
1/2 teaspoon dried dill
2 tablespoons dried parsley

Preheat oven to 400º. Combine chickpeas, hot sauce, and lemon juice in a bowl. In a separate bowl, mix the spices together. Add spice mixture to the chickpeas and stir to combine.

Line a baking sheet with foil or parchment paper. Pour chickpeas onto it and spread out in a single layer. Bake for 35-50 minutes, stirring every 15 minutes, until lightly browned. Enjoy!

Sunday, August 18, 2013

Blackberry Cobbler

Blackberry cobbler and ice cream are the perfect combination!

I have a confession to make. I used to hate blackberries. My mom would make blackberry pie and I would turn up my nose. Too many seeds! Not sweet enough! I don't like pie! (To be completely honest, I still don't like pie very much. Crust is just really not my thing.) Maybe it was the seeds. Maybe it was the child labor involved to harvest the berries. Maybe it was the scratches from the thorns and the bee stings. I really don't know where the dislike started, but I have since changed my mind about blackberries. They are plump, juicy, and delicious, especially in this cobbler.

Hello, Delicious!

The cobbler topping on this was so good. We sprinkled some raw sugar (turbinado sugar) on top before baking, so the topping ended up soft and pillowy in the middle with a slightly crunchy top layer from the sugar. Perfection. The first time I made this, we used too many blackberries (7-8 cups instead of 6) and it didn't thicken up well. We made it again, and were careful to use only 6 cups of berries, and it turned out perfectly. This is a great summertime dessert-and a perfect Pacific Northwest treat!

Blackberry Cobbler
*Adapted from Tasty Kitchen

1 1/2 cups flour
1 1/2 cups sugar, divided
1 1/2 teaspoons baking powder
1 teaspoon salt
9 tablespoons cold, unsalted butter
1/3 cup boiling water
3 tablespoons cornstarch
1/3 cup cold water
1 1/2 tablespoons lemon juice
Zest from one lemon
6 cups fresh blackberries, rinsed and drained
1-2 teaspoons turbinado sugar

Preheat oven to 400º. In a large bowl, mix flour, 3/4 cup sugar, baking powder, and salt. Cut the butter in pieces and use a pastry cutter or two forks to cut it into the flour mixture, until it resembles coarse crumbs. Stir in the boiling water until the mixture is just evenly moist. Set aside.

In a large bowl, dissolve the cornstarch in cold water.  Add the berries, remaining 3/4 cup of sugar, lemon juice, and lemon zest. Transfer to a skillet and bring to a boil, stirring frequently. Allow to boil for about 5 minutes, or until it starts to thicken. Transfer to a baking dish (I used a 9x11 oval baking dish and it worked perfectly). Drop the dough on top by spoonful and sprinkle turbinado sugar over the top.

Bake 25 minutes, until dough is golden brown. Enjoy with a generous scoop of ice cream!
Yes, this smells as good as it looks!

Monday, August 5, 2013

Our Favorite Salsa

Best salsa EVER!
This is far and away the best salsa I've ever had and I don't have to go anywhere special to get it, which I love! You could easily use fresh tomatoes, when in season, but Hunt's canned tomatoes are delicious and very, very fresh tasting. This might be one of the easiest recipes I make, but it is always a crowd pleaser!

I have blogged this salsa before here, but I felt like it merited another post. I make this at least once a month and even more frequently in the summer. Hubby's co-workers request it and so do our friends any time we're going to a potluck or BBQ. I've had quite a few requests for the recipe lately, so I though that this would be a good chance to write about it again and (hopefully) get a better photo of it. So, here it is again. Enjoy!

Our Favorite Salsa
*Slightly adapted from The Pioneer Woman

1 28-oz. can Hunt's whole tomatoes, drained (or 2 14.5-oz. cans)
2 cans RoTel tomatoes and peppers, drained (you can use any combination of mild, medium, or hot)
1/2 medium white onion, chopped
1 clove garlic, minced
2-3 whole jalapeños, quartered and thinly sliced (remove ribs and seeds to lower the level of spiciness)
1/4 teaspoon sugar
1/2 teaspoon kosher salt
1/2 heaping teaspoon cumin
1 bunch of cilantro, stems removed
1/2 lime, juiced or 1 1/2 teaspoons of lime juice

Add all ingredients to a food processor and pulse until you reach the desired consistency. Taste to test for seasoning. Add more sugar or salt, as necessary-I usually add a small pinch more of each.

Refrigerate for at least one hour to allow flavors to marry. Enjoy!

Sunday, August 4, 2013

Steak and Mushroom Pot Pie

Hubs has been working a lot of overtime lately, so he decided to take a few days off last week. We had 6 glorious days in which I didn't have to worry about him or do the mostly-single parent thing; it was amazing. We spent lots of family time together, which was great. We went hiking, garage sale-ing, and checked out a few of the local street fairs. Our area also boasts the largest Scottish Highland Games this side of the Mississippi, which just happened to be on the weekend Hubs took off.

If you've never gone to a Highland Games event, you should. It was so much fun! There were bagpipers, dancers, dogs, clan booths, and yummy food. I mean REALLY yummy food. Hubs tried haggis (here's an explanation of what haggis is). Em tried it too, and really liked it. Because all 21-month-old toddlers like haggis. She's an odd little duck! I tried it too, but I was much more excited about my steak and mushroom pot pie. Fall-apart meat and mushrooms in a rich, hearty gravy topped with a puff pastry crust. Yep, doesn't get much better than that! I promised Hubs that I would try to replicate it as soon as possible. It was that good. Well, today I found a recipe that seemed very promising and with just a couple of very small tweaks, I made something that we absolutely loved. This one goes in the permanent recipe file, for sure. And, all in all, it was pretty darn easy too!

Steak and Mushroom Pot Pie
*Very slightly adapted from Simply Delicious

2 tbsp butter
2 tbsp olive oil
3 1/2 pounds stew beef (or cut chuck steak into chunks, bone removed)
2 shallots, diced
3 carrots, diced
2 stalks celery, diced
8 ounces mushrooms, sliced
3 cloves garlic, diced
2 tsp smoked paprika
1 tsp dried thyme
1 tsp dried rosemary
1 tsp dried oregano
Salt and pepper
2 bay leaves
2 cups beef stock
1 tbsp worcestershire sauce
1 tbsp cornstarch
1/4 cup milk
2 sheets puff pastry, thawed
1 egg, beaten

Melt butter and olive oil in a large Dutch oven over medium-high heat. Brown the beef in batches, making sure not to crowd the pot; season each batch with salt and pepper. This takes between 3-5 minutes total, per batch.

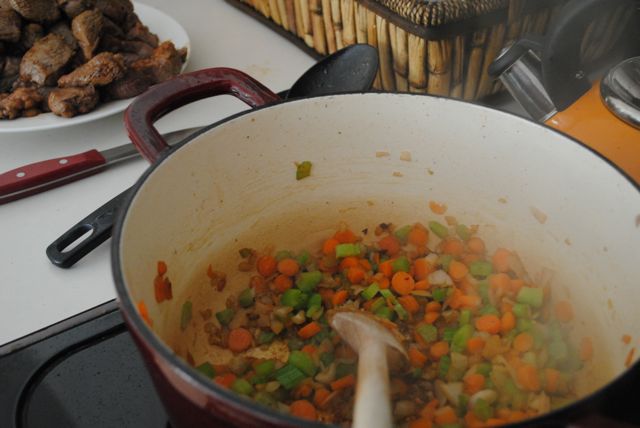
In the same pot, sauté the carrots, celery, and onion until soft and fragrant, about 10 minutes, making sure to scrape up all the yummy bits from the bottom of the pan. 

Add in the garlic and mushrooms and sauté for 8 minutes. Then add the paprika, thyme, rosemary, oregano, bay leaves, and salt and pepper, to taste. Stir well.

Add the beef back into the pot, juice and all. Pour in the stock and stir to combine. Reduce heat to low. Cover the pot and allow it to simmer gently for 1 1/2-2 hours.

Preheat the oven to 355º. 

When the meat is very tender (it falls apart easily with a fork), add worcestershire sauce and taste for seasoning. Add more salt and pepper, if necessary. Turn up the heat to medium-high. Whisk together the cornstarch and milk, and pour this mixture into the pot. Simmer rapidly to thicken, about 10 minutes.

Butter the bottom and sides of a large baking dish. Press one sheet of puff pastry into the bottom of the dish and up the sides. Pour in the beef mixture. Top with the second sheet of puff pastry and pinch the edges together with the bottom sheet. Brush with beaten egg and cut two slits in the top.

Bake for 35-40 minutes, or until the pastry is browned. Enjoy!