Showing posts with label Family recipes. Show all posts

Wednesday, May 4, 2016

Bean and Bacon Soup

This is such a throwback to my childhood! I loved the bean and bacon soup in the red and white can. However, as an adult, when I tried that childhood favorite, I was sorely disappointed. So, I set out to make my own version of this warm and comforting soup. And I just have to say, the results are delicious! This is my all-time favorite soup to eat with grilled cheese sandwiches and my kids LOVE it. Seriously. The 1 1/2-year-old had two huge servings and the 4-year-old kept telling me how yummy it was. Score! 

This does take a few more steps compared to the canned version. But it is worth it. Trust me!

Bean and Bacon Soup

1 pound smoky bacon, cut into chunks*
1 onion, diced
3-4 stalks of celery, diced
3 carrots, diced
4 cloves garlic, minced
2 tablespoons flour
2 tablespoons tomato paste
5 cups chicken stock
2 bay leaves
4 cans great northern (or white) beans
Salt and pepper

In a Dutch oven, cook bacon chunks until crisp. Remove with a slotted spoon onto a plate lined with paper towels, then remove all but 2 tablespoons of bacon fat. To the bacon fat in the Dutch oven, add onion, celery, and carrots over medium heat. Season with salt and pepper and sauté for 8 minutes. Add garlic and cook an additional minute. 

Sprinkle in the flour, stir and cook for 2 minutes. Add tomato paste and cook another minute. Whisk in chicken stock, add bay leaves and cook on medium-low heat for 15-20 minutes. Meanwhile, in a small blender or food processor, mince your cooked bacon. This is optional, of course, but so worth it. Bacon bits in every bite!

Add the beans and bacon and simmer on low heat for 30 minutes. Taste for seasonings and remove the bay leaves. Serve in big bowls and enjoy! 

*Cook's Note: We've used low-sodium bacon and found it didn't have enough taste, so we added about 1/4-1/2 teaspoon liquid smoke at the same time as the chicken stock and that added the smoky flavor we were looking for.

Sunday, January 3, 2016

Skillet Chicken Pot Pie


I am a huge fan of meals that can be made in one (or two) pots. The fewer dishes, the better! My least favorite kitchen chore is doing the dishes. In fact, when Hubby is on his weekend, the dishes are his job. He knows I hate doing them, but when he works, it's on me since he leaves right after we finish eating. One more reason I really, really look forward to his weekends!

This skillet chicken pot pie is a wonderful, one pot dish that is a huge crowd pleaser. When it comes out of the oven, it looks so yummy and amazing, you really feel like you've got a handle on the whole cooking thing. Look what I made! Look how pretty! It looks delicious and smells like heaven! Yep, it's a good one.

Skillet Chicken Pot Pie

12-inch cast iron skillet
3-4 cups cooked, shredded chicken
3 tablespoons olive oil
2 tablespoons butter
1 shallot, finely diced
5 cloves garlic, minced
6 sage leaves, finely chopped
1/3 cup flour
4 cups chicken stock
2/3 cup half and half
4 cups frozen veggies, thawed (I like a mix of carrots, peas, and corn)
Salt and pepper
1 sheet puff pastry, thawed
1 egg, beaten

Preheat oven to 425 º. Heat oil and butter in the cast iron skillet on medium-low heat. Add shallots and sauté for 3 minutes, then add garlic and sage and cook for 30 seconds. Add flour, stir to coat. (You can add a drizzle of extra oil here, if necessary). Cook for 2 minutes, stirring frequently. Add broth 1/2 cup at a time, whisking as you go. Whisk in half and half and season with salt and pepper. Increase heat to medium high and cook for 2 to 3 minutes to thicken. Add the veggies and chicken and simmer for 5 minutes. Taste for seasoning and add salt and/or pepper, as needed.

Unroll the thawed puff pastry onto the top of the skillet. Carefully pinch down the edges (the skillet is warm!) and brush with the beaten egg. Cut a few lines in the pastry sheet to vent. Bake for 15 minutes, then lower the heat to 375º and bake for 5-7 minutes longer until the top is nicely browned. Let it rest for 10 minutes, then slice and serve. Enjoy!

Our Favorite Chicken Noodle Soup

I try to be really good about meal planning at the beginning of every week. I think that things just go a bit smoother when I have an organized plan for meals. However, I sometimes fall a bit short on that goal. When that happens, we have a few go-to recipes that do the job on short notice, such as a simple chicken noodle soup that does the job when we are in a time crunch. It's just chicken, stock, carrots, celery, and pepper. Easy!

But, lately, we've been obsessed with this slightly more complicated version. It is so delicious and full of many layers of flavor. Even though you start with boxed stock, you add so much to the complexity of it that, by the end, you'll think you used homemade chicken stock. It's comforting and a little fancy (for chicken noodle soup, anyway) and completely delicious. It's our favorite chicken noodle soup recipe, hands down!

Our Favorite Chicken Noodle Soup

4 tablespoons butter
1 tablespoon olive oil
1/2 cup flour
1/2 yellow onion, diced
3/4 of a small bag of baby carrots (probably two cups worth), diced
5 stalks of celery, diced
Rotisserie chicken, shredded
2 boxes of chicken stock
4 cups water
1 1/2 tablespoons chicken base (or you could use chicken bouillon, but I really would recommend the chicken base)
3/4 teaspoon dried thyme
2 bay leaves
1 bag of Reames noodles (in the freezer section of your grocery store)
2 tablespoons chopped fresh parsley
Salt and lots of freshly cracked pepper

Melt butter and oil in a Dutch oven over medium heat. Sauté chopped onions, celery, and carrots with a pinch of salt and lots of pepper in butter and oil for 10 minutes. Sprinkle in the flour, stir, and cook for 2 minutes. Slowly whisk in 2 boxes of stock and bring to a boil. Add the bay leaves and thyme and reduce heat to medium-low and simmer for 20 minutes.

Add in 4 cups of water and chicken base. Season again with pepper. Add the noodles and bring to a boil. Boil for 10 minutes, then add the shredded chicken and cook for 5 minutes. Finally, add the parsley and taste for seasonings. I usually add more pepper at this point, but we love lots of pepper! Cook for 5 minutes more, then remove the bay leaves and serve. Enjoy!

Monday, November 16, 2015

Chicken Chow Mein


My husband LOVES Chinese food. He craves it like I craved beef and spicy food when I was pregnant with my girls. It's actually pretty funny, since all I have to do is say broccoli beef or fried rice or sweet and sour chicken or chow mein and he starts drooling, Pavlov's dogs style. When we stumbled across this recipe, I decided to add some shredded rotisserie chicken to it to make it a meal and we were all obsessed: me, Hubby, the 4-year-old, and the toddler. We now make this once every other week without fail. It is fast, easy, and completely delicious. I love having this chicken chow mein in my recipe arsenal, since it is always a hit!

There are a couple of important things to note in this recipe. The first is the yakisoba noodles. You can find those in the refrigerated section in your grocery store's produce section. The other is the ginger. The original recipe calls for grated fresh ginger. We tried it that way and thought that it made the recipe taste a little sweet, which we didn't like, so we use ground ginger. It has a spicier flavor that we love. These are just our preferences, so use what you like! 

Chicken Chow Mein
*Adapted from Damn Delicious

1 rotisserie chicken, shredded 
4 stalks celery, diced
1 yellow onion, diced
2-3 cups cabbage, chopped
2 packages yakisoba noodles, sauce packets discarded 
2 tablespoons canola or olive oil
Crispy chow mein noodles, optional

For the sauce:
1/3 cup soy sauce
4 cloves garlic, minced
1 heaping tablespoon brown sugar
1/8 teaspoon ground ginger
1/4 heaping teaspoon white pepper

In a small bowl, whisk together the sauce ingredients and set aside. Cook yakisoba noodles according to the package directions. We do ours in the microwave. You just poke a couple of holes in the packages and microwave them separately for a minute and 20 seconds, give or take (again, we've made this so many times that we have it down to a science). Once done, break up the noodles and set aside.

Meanwhile, heat canola oil in a large skillet on medium high heat. Add onions and celery and sauté for 6 minutes, stirring constantly. Add cabbage and sauté for 2 minutes. Add chicken and noodles and stir to heat through. Make a hole in the ingredients and pour in the sauce mixture. Remove from heat and gently toss the chow mein to get it all coated in the sauce. Serve immediately topped with crispy chow mein noodles (the ones in the blue can), if desired. Enjoy!

Wednesday, September 3, 2014

Chicken and Dumplings


I love my family, especially my mom, who is one of the best cooks in the world, I swear. Nothing compares to some of her dishes for comfort and deliciousness. That said, because my dad wasn't an adventurous eater when we were growing up, my mom had a meat and potatoes philosophy when it came to dinner and had a number of meals that were on a permanent rotation. We didn't have onions or garlic in our food, unless it was the powdered form. Fortunately, Hubs and I are the exact opposite and really like to try new recipes with all kinds of ingredients-especially garlic and onions!

This recipe is one that I created because, although I didn't have chicken and dumplings growing up, Hubby did. Coming from a Ukrainian family meant that dumplings were a staple, according to him, and he really wanted chicken and dumplings a few weeks ago, so I obliged. We had a rotisserie chicken from Costco (the best kind of chicken for just about any dish) and Hubby didn't want carrots, so I used peas and celery and then chopped up the celery tops to add to the dumplings because I love, love, love the flavor of celery leaves. I've made this a couple of times since and I love it even more each time. It's even better the next day, which is really nice! The best part of the recipe is that it's easy to change it up. Add carrots or diced potatoes or any other veggies you like. We won't be changing it up much because we love it so much as is. Another permanent recipe dish, for sure!

Chicken and Dumplings

3-4 chicken breasts, cooked and shredded (or one large rotisserie chicken, shredded)
1 bunch of celery, with the tops
2 shallots or 1 yellow onion, finely diced
3 cloves garlic, minced
3 tablespoons butter
3 tablespoons flour
1 1/2 quarts chicken stock (1 1/2 boxes)
1/3 cup milk
Salt and pepper
1/4 teaspoon dried thyme
2 tablespoons cornstarch
2 tablespoons water
2/3 cup frozen peas

For the dumplings:
1 1/4 cups Bisquick
1/2 cup milk
1-2 tablespoons minced celery tops

Melt the butter in a large Dutch oven over medium heat. Chop up four ribs of celery and add to the pot with the onions and garlic. Season with salt and pepper and sauté for about 6 minutes, or until softened a bit. Whisk in flour and cook for 1-2 minutes, whisking constantly. Add stock and bring to a boil, whisking to remove all the yummy bits from the bottom of the pot. Boil for 5 minutes.

Reduce heat to medium-low and add milk, thyme, and salt and pepper to taste and cook an additional 5 minutes. Make a slurry with the cornstarch and water and whisk into the broth, then add chicken and peas. Heat through for a few minutes while you make the dumplings.

For the dumplings: Mix Bisquick, milk, and chopped celery tops together in a medium bowl. Gently spoon the mixture by tablespoonfuls on top of the chicken stew. Cover the pot and gently steam the dumplings on the stovetop on low heat for 20 minutes until firm and puffed. Spoon into bowls and enjoy!

Monday, August 18, 2014

Beef Stew in a Red Wine Sauce

A terrible photo of an absolutely amazing meal!

I have been very lucky this pregnancy, in that I have been able to cook and enjoy it almost the entire time (the first few months were a bit iffy!). I'm also lucky to have a husband that LOVES food and gets really, really excited about trying new recipes and techniques. He's a great help in the kitchen, too. This recipe was definitely one that required an extra set of hands because of all the steps--and because I'm eight months pregnant and the size of a duplex, so I don't move very fast!

In terms of work, this particular recipe is really up there, but the end result is worth it a thousand times over. Every flavor was amazing, every component was worth the work it took, every bite was heaven. Sometimes a dish is just so perfect that you can't help but smile when you eat it (and maybe your eyes roll back in your head a bit--I'm not saying mine did, but . . . yeah, they did). Because we changed the second part of this recipe so much, I wanted to make sure that I blogged it so we won't forget exactly what we did. I'm eventually going to make a family recipe book, which will include our favorite dishes. This one will absolutely be in that book--with a much better set of photos! My push present for this baby is going to be a new camera and lens--thanks, Hubby! Anyway, here is the beef stew in a red wine sauce in all its delicious glory!

Beef Stew in a Red Wine Sauce
*Adapted from Jacques Pépin

First phase:

3 tablespoons olive oil
3 pounds beef stew meat, cut in 2 inch chunks
Salt and Pepper
1 yellow onion, finely diced
4 cloves garlic, finely minced
2 tablespoons flour
1 bottle dry red wine**
2 bay leaves
1 thyme sprig

**We used Costco's Kirkland Signature Côtes du Rhône, which was inexpensive and yummy. For more sauce, I might use a bottle and a half next time.

Preheat the oven to 350º. In a Dutch oven, heat the olive oil over medium high heat. Generously season the meat with salt and pepper and brown in a single layer (you'll need to cook it in batches), about 3 minutes per side. Remove the meat, place on a plate, and set aside. Lower the heat to medium and add a little more olive oil, if necessary. Add onion and garlic and sauté until the onion is soft, about 5 minutes. Add the meat and any juices on the plate back into the pot and sprinkle with flour. Stir to coat the meat, then pour in the red wine. Add the bay leaves, thyme, and salt and pepper and bring to a boil, stirring to incorporate all the delicious brown bits on the bottom of the pot. Cover and place in the oven. Cook for 2 hours, or until the meat is fork tender.

Second phase:

1 package of bacon, cut into 1-inch pieces
1 yellow onion, finely diced
15 baby bella mushrooms, diced
15 baby carrots, diced
Salt and pepper

Sauté bacon in a large skillet until cooked through and a bit crispy. Remove and place on a plate with paper towels and set aside. Drain off all but 1-2 tablespoons of the bacon fat and add onion, mushrooms, and carrots. Season with salt and pepper and cook over medium heat, stirring constantly for about 15 minutes, or until the veggies have softened and the mushrooms have released their liquid.

To serve:

Add a healthy dollop of mashed potatoes to a bowl. Place a few delicious pieces of super tender meat on top of the potatoes, then sprinkle on some bacon and a generous amount of the veggies. Top with the red wine sauce and enjoy every blissful bite!

Thursday, October 17, 2013

Broccoli Cheese Soup


I used to hate broccoli. Like I had a true, honest, complete HATRED for broccoli. It's nasty, I can't stand the taste, I don't want to eat mini trees . . . and on and on and on. It was pretty dramatic-and ridiculous. I have since seen the error of my ways and now I LOVE broccoli. We buy the giant bags of florets from Costco and use it up within two weeks. Broccoli in everything! This soup, in particular, is a family favorite. I wrote down the recipe and have reworked it over and over again until it is perfect-at least in our opinion. The notebook page it's on is covered with mashed broccoli bits, dried cheese, and splashes of milk-all signs of a well-used recipe! My husband is a huge fan and claims that it is just as good as Chili's, which is really, really high praise coming from a self-proclaimed broccoli cheese soup aficionado.

I know that 8 cups of chopped broccoli is a lot, but that is the way we like it--with lots and lots of broccoli! We have made it with 5 cups of chopped broccoli, 2 cups of half and half, 3 cups of chicken stock, and 3 cups of shredded cheese, but my family likes it as written below. My 6-year-old is so excited to take the leftovers to school for lunch in her thermos. She inhaled two huge servings tonight! If you ask her, she will tell you that Mom's broccoli cheese soup is her favorite meal. That's a win in my book!

Broccoli Cheese Soup

2 shallots, finely diced (or one small yellow onion)
4-5 cloves garlic, chopped
5 tablespoons salted butter
1/2 cup flour
3 cups half and half
4 cups chicken stock
1 cup milk
8 cups chopped broccoli florets (from about 7 broccoli crowns)
Kosher salt and cracked black pepper
4 cups shredded cheddar cheese (sharp or extra sharp is best)
1/4 teaspoon nutmeg

Melt the butter in a large stock pot or Dutch oven. Add onion and season lightly with salt and pepper. Sauté on medium heat about 5 minutes, until translucent. Add garlic and cook for 1 minute, then add flour and cook 2 minutes.

Slowly whisk in half and half, milk, and chicken stock. Simmer on medium low heat for 20 minutes.

Add broccoli and nutmeg and season with salt and pepper, to taste. Simmer on medium low heat for 30 minutes or until broccoli is fork tender.

Using an immersion blender, blend the soup for a few minutes to your desired consistency, or, alternately, use a blender and purée half the soup, then add it back to the pot. Bring the soup back up to temp and add the cheese. Once the cheese is melted, it's ready to serve with some extra cheddar sprinkled on top. Let's face it, this is not a healthy recipe, so go nuts with the cheese! Enjoy!

Wednesday, September 11, 2013

CrockPot Buffalo Chicken Tacos

Spicy, Buffalo-wingy goodness right there!
My husband loves all things Buffalo. As in the wings, not the city. I've seen him put Buffalo sauce on just about anything, sometimes to the point of making me gag. So, I thought he would be really excited about these tacos when I pitched him the idea last night while he was at work.
"Eh, okay," he says.
"REALLY? That's all the excitement I get for BUFFALO chicken tacos?"
"It's just that we have tacos all the time . . . "
Hmm, he does have a point. Tacos are my go-to meal when I can't come up with anything more creative. "But these have BUFFALO sauce!"
"Okay, we can try them," his final answer.
GRRR.

I made them anyway because, let's face it, I can't come up with elaborate, time-consuming meals every stinkin' day, so Buffalo chicken tacos were happening. Well, his immediate response after the first bite solidified my genius:
"You were SO right! I will never doubt you again. Oh my gosh, so good!" Yes, that is what he actually said. I'm right. Of course, haha! Never doubt the wife!

Now I'm going to bask in the glory of my husband telling me I'm right (I am almost always right, but he rarely admits it) while I attempt to clean the Buffalo sauce off of every surface in my kitchen.

Oh, and if you like Buffalo sauce, try this one. It's definitely a keeper in our house!
Being right sure looks good.


CrockPot Buffalo Chicken Tacos

3-4 boneless, skinless chicken breasts (I used frozen and it worked great!)
1/4 teaspoon pepper
3/4-1 cup Frank's RedHot Buffalo Wing Sauce (I used 1 cup with 3 breasts, 3/4 cup would have been plenty)
3 tablespoons melted butter
Corn tortillas
Oil for frying
Chunky blue cheese dressing
Coleslaw mix
Green onions, chopped
LOTS of napkins!

Spray your crock with oil-I use a Misto with olive oil, but Pam would work fine. Place chicken breasts in the crock and sprinkle with black pepper. Mix Frank's RedHot and melted butter together and pour over the breasts. Cover and cook on low for 4-6 hours, or until chicken shreds easily with a fork.

Remove chicken from the CrockPot and shred with two forks. Put the chicken back into the hot sauce mixture and stir. Turn to high and leave the lid off for 10 minutes. The chicken will be very juicy and doesn't thicken much, hence the need for lots of napkins!

Meanwhile, heat the oil in skillet and quick fry your tortillas. We use a cast-iron skillet on medium heat and do about 30 seconds a side. You could also use flour tortillas, if you don't want the mess and hassle of frying.

Serve tacos with coleslaw, chunky blue cheese dressing, and chopped green onions. Enjoy!

Monday, August 5, 2013

Our Favorite Salsa

Best salsa EVER!
This is far and away the best salsa I've ever had and I don't have to go anywhere special to get it, which I love! You could easily use fresh tomatoes, when in season, but Hunt's canned tomatoes are delicious and very, very fresh tasting. This might be one of the easiest recipes I make, but it is always a crowd pleaser!

I have blogged this salsa before here, but I felt like it merited another post. I make this at least once a month and even more frequently in the summer. Hubby's co-workers request it and so do our friends any time we're going to a potluck or BBQ. I've had quite a few requests for the recipe lately, so I though that this would be a good chance to write about it again and (hopefully) get a better photo of it. So, here it is again. Enjoy!

Our Favorite Salsa
*Slightly adapted from The Pioneer Woman

1 28-oz. can Hunt's whole tomatoes, drained (or 2 14.5-oz. cans)
2 cans RoTel tomatoes and peppers, drained (you can use any combination of mild, medium, or hot)
1/2 medium white onion, chopped
1 clove garlic, minced
2-3 whole jalapeños, quartered and thinly sliced (remove ribs and seeds to lower the level of spiciness)
1/4 teaspoon sugar
1/2 teaspoon kosher salt
1/2 heaping teaspoon cumin
1 bunch of cilantro, stems removed
1/2 lime, juiced or 1 1/2 teaspoons of lime juice

Add all ingredients to a food processor and pulse until you reach the desired consistency. Taste to test for seasoning. Add more sugar or salt, as necessary-I usually add a small pinch more of each.

Refrigerate for at least one hour to allow flavors to marry. Enjoy!

Friday, June 22, 2012

CrockPot Kalua Pork

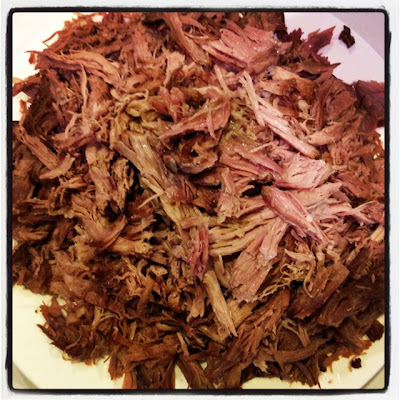
This is one of the best recipes I've ever tried. Other than a few minutes of prep work and the ten minutes it takes to shred, this pork is easy, flavorful, and makes enough for a crowd. Hubby and I will eat this with BBQ sauce on sandwiches or in tacos with spicy black beans and sour cream. It lasts for days! An added bonus is that our 8-month-old loves it too. The smoke flavor is pretty mild, but so delicious-it's even baby approved!

Kalua Pork

5-8 pound bone-in pork roast
1 1/2 tablespoons coarse sea salt
2 tablespoons liquid smoke

The first thing I learned about the prep work for this recipe is to wear gloves! Liquid smoke smell will stay on your hands all day if you don't wear those gloves. Pierce your pork roast all over with a fork (we use a tenderizing fork so we get some nice big holes). Make sure you get all sides.

Rub in your sea salt.


Pour on the liquid smoke and massage that in as well. 

Place the roast in the CrockPot and cook on low until the meat starts to fall apart, anywhere from 8-12 hours, depending on the size, turning once. Remove the meat from the slow cooker and drain the juice into a bowl. Do NOT throw that out-that's the good stuff!

Shred your pork, removing the fat as you go. Return the shredded meat to the slow cooker and add in a few large spoonfuls of that delicious juice you saved. You'll know you have enough when the meat starts to look very moist. Cover and cook on low for about 30 minutes.

Serve in tacos or with BBQ sauce on sandwiches. Or be like my hubby and eat it right out of the CrockPot. Pat yourself on the back because this dish is SO good! And enjoy!

Friday, April 27, 2012

Chicken Noodle Soup

I make this chicken noodle soup at least once a month and, since it makes such a large amount, Hubby and I eat it for a few days afterward. The best thing about these leftovers: they just get better and better. Another good thing about this recipe is that it is extremely easy. On nights I don't want to bother with cooking chicken, I pick up a whole roasted chicken from the store (Costco has the best ones!) and Hubby shreds it while I chop up veggies. 

I know that chicken noodle soup isn't fancy or "special," but this is one of my all-time favorite recipes. I'd say it's definitely in the top five! This can be made last minute or you can let is simmer for a few hours and really get some amazing flavor out of the stock. As with most dishes, I think homemade chicken stock would make the soup extra delicious, but I always use boxed stock because it's a lot quicker and easier. Try this soup! I promise it won't disappoint!

Chicken Noodle Soup


4 chicken breasts, cooked and shredded (or a whole roasted chicken, shredded)
4 or 5 boxes of chicken stock (4-5 quarts of stock)
A 16-20 ounce bag of baby carrots, chopped small (the smaller the carrots, the quicker they will cook)
4-6 stalks of celery, chopped (about the same size as the carrots)
2 pound bag of egg noodles
A pinch of salt
Lots and lots of freshly cracked pepper

Add your veggies, chicken, salt, pepper, and 2 quarts of chicken stock to a large pot. Bring to a boil and then reduce heat. Simmer at medium heat for 45 minutes or at low heat for a few hours, or until the carrots and celery have softened.

Turn up the heat, add noodles and enough stock to cover, about 2-3 quarts, depending on how much the cooking liquid has reduced. Cook until the noodles are al dente. Serve immediately. Enjoy!

*This keeps well in a sealed container in the fridge for a few days. Just add a little bit of water before you heat it up to give it a little more broth.

Friday, January 13, 2012

Sourdough, Apple, and Shallot Stuffing-The BEST Stuffing Ever!


Hubby and I are very particular about our stuffing. We like lots of flavor and a bit of crispiness in our bread. For us, stuffing should be a wonderful side dish that can stand up to the rest of a holiday meal and be memorable in and of itself. This stuffing took me a while to perfect, but once I did, it became our favorite part of Thanksgiving. I make this dish all the time so that we get to enjoy it more than once a year because it's too good to eat just once. You can't go wrong with apples, shallots, herbs, and the delicious taste of sourdough bread!

Sorry for the picture; I never got a final one. But it's good and beautiful, I promise!

Sourdough, Apple, and Shallot Stuffing

2 large loaves sourdough bread (we use 2 large boules)
1 stick butter
1 or 2 shallots, diced
2 or 3 Granny Smith apples, peeled, cored, and diced
4 1/2 cups chicken broth
1/2 teaspoon dried basil
1/2 teaspoon thyme
2-3 teaspoons chopped fresh rosemary
1/4 cup chopped fresh parsley
Salt, to taste

Chop the bread into 1-inch cubes and set on cookie sheets to dry overnight or toast in a 350º oven for 3-45 minutes or until slightly crispy, but not browned.

Melt butter in a large skillet over medium heat. When it's melted, add the shallot and apple and cook until the shallot is translucent, about 5 minutes. Add 4 1/2 cups chicken broth and bring to a boil. Add in the herbs and stir to combine.

Place dried breadcrumbs in a large bowl and gently mix. Add in the broth mixture a ladleful at a time and gently toss to coat. Taste as you to adjust seasonings. Add in salt to taste. If the breadcrumbs are still a little dry once you've added all the broth mixture, add more broth and toss again.

Pour stuffing into a large baking dish and bake in a 350º oven for 20-30 minutes or until golden brown on top. Enjoy!

Saturday, November 12, 2011

Nana's Chili

Our good news: Hubby and I welcomed our little bundle of joy on October 14th at 7:39am. Her name is Emma Naomi after her great great grandma Emma and great grandma Naomi and we are ridiculously head over heels in love with her! Having a baby is the most amazing experience ever and, although I haven't forgotten the misery, I can't wait to do it again in a year or two. For now, we are just loving Emma and enjoying every second with her.

Now for the food! About a week after Em was born, I was really craving comfort food and this recipe wouldn't leave my mind. This is my Nana's (better known as Naomi!) recipe, so it was fitting that I make it to celebrate Emma's arrival. Nana may not have been here to welcome Em, but I know she was watching. Just eating her chili made it feel like she was close. And this is good chili. It's just spicy enough and full of goodness with lots of beans and delicious spices and flavor. I'm writing the recipe as we make it, which means that we don't dice the onion or green bell pepper and we don't sauté it with the ground beef. My dad hates onion and green pepper, but the flavor is necessary, so the onion goes in whole and the pepper is quartered. This is how I've always eaten it, so this is how I chose to make it. And it didn't disappoint. Comfort food in a bowl!

Nana's Chili
*From Naomi

1 pound ground beef
1 large onion
1 green bell pepper
2 tablespoons brown sugar
1/2 teaspoon onion powder
1/2 teaspoon garlic powder
1/2 teaspoon pepper
3/4 teaspoon salt
1 1/2 teaspoon basil
1 1/2 teaspoon oregano
2 teaspoons chili powder
1 teaspoon red pepper flake
1 can stewed tomatoes
2 cans tomato sauce
2-4 cans dark red kidney beans, drained and rinsed (I use 4 because the beans are my favorite part!)
1 large can tomato juice

Brown the ground beef and season with garlic powder and onion powder. Drain the fat and add two tablespoons brown sugar. Stir.

Add the ground beef and then the other ingredients, except the onion and green pepper, to a large pot and stir.

Quarter the green bell pepper and remove the ribs and seeds. Peel the onion and add the whole onion and pieces of pepper to the chili and stir.
Cook on low heat for 3-5 hours (or all day in a slow cooker), stirring occasionally. Remove the onion and bell pepper before serving. Enjoy!

Saturday, September 17, 2011

Aunt Kathy's Chicken Tetrazzini


Update (Jan 2017): We have been making this for a long time and have changed it up to reflect our tastes. I've found that adding a whole lot of garlic makes this the best dish ever. Some add mushrooms and peas, which could certainly be delicious, but I like serving it with a simple salad and calling it good. We also only make it using penne, as it holds the sauce a lot better than spaghetti.

Now that I am nearing the end of my pregnancy (37 weeks on Monday!), my complete aversion to all things chicken has subsided somewhat. I'm not saying that if you put a medium rare filet mignon and a piece of chicken in front of me, I'm not going to choose the succulent piece of beef, but at least the thought of chicken doesn't make me gag anymore.

This recipe definitely doesn't make me gag. In fact, I ate most of the leftovers, which says a lot in this house! My mom started making this only a few years ago and I've always loved it, so when I got the recipe from her a few weeks ago, I couldn't wait to make it. It came from my amazing Aunt Kathy, so you know it's good. It's also very simple. The recipe requires a few pans, so you will make a bit of a mess (or, if you're like me, a huge mess), but it is so worth it. This makes a lot, so you can easily feed a crowd or freeze the leftovers. That was my plan, you know getting ready for baby and all, but I ended up eating the leftovers. Oh well. It was worth it!

Aunt Kathy's Chicken Tetrazzini
*Adapted from my Aunt Kathy's recipe

1 pound penne (or pasta of your choice)
1/2 cup butter (1 stick)
6 cloves garlic, minced
3/4 cup flour
2 cups hot milk
2 cups hot chicken broth
1/2 heaping teaspoon salt
1/2 heaping teaspoon pepper
1/4 teaspoon nutmeg
1/2 cup sherry
1 cup heavy cream
1/2 pound mushrooms, sliced
2-3 cups diced cooked chicken (3 breasts)
1/2-2/3 cup parmesan or Romano cheese, grated
2/3 cup Italian breadcrumbs

Preheat oven to 400º. Cook pasta until just before al dente. Add milk and chicken broth to a large microwave-safe bowl or glass measuring cup and microwave until warm. Meanwhile, melt 1/2 cup butter in a large saucepan over medium heat. Add garlic and sauté for a minute. Whisk in flour. Cook for a minute or two and then stir in hot milk and chicken broth. Cook and stir until thick. Add more milk or broth if the mixture becomes too thick. 

Whisk in salt, pepper, nutmeg, sherry, and heavy cream (or milk, if you want to lighten it up a little bit) and remove from heat. One delicious thing we've started to do here is to add about 1/3 cup or more of parmesan to the sauce. Completely optional, but very yummy.


Mix the sauce, noodles, and chicken together. 

Pour into a large greased baking dish. 

 Mix the parmesan or Romano cheese and breadcrumbs and sprinkle on top of the pasta. 

Bake for 30-45 minutes or until bubbly and enjoy!

Thursday, September 8, 2011

Mom's Apple Crisp


Well, Hubby and I have officially begun the countdown. Baby girl is due in about 4 weeks and we're hoping (praying, begging) that she is a little early because the end of this pregnancy has been far more difficult than the beginning. Of course, the sweltering heat this week doesn't make the swollen ankles and discomfort any better, but the end is in sight. I just have to keep telling myself that!

I made this recipe a long time ago and the photos have been sitting on my computer waiting to be put into a post. I confess that I haven't been all that inspired to write or do much of anything lately, but I have to share this one before fall is really upon us because this apple crisp begs to be made in the cool weather I know is just around the corner. This recipe is my mom's, but it's also in one of my Nana's old cookbooks, which is probably where Mom got it in the first place. Regardless, Mom's apple crisp is guaranteed to make you happy and make your house smell like heaven. It's very, very easy too and always a crowd pleaser. So, once you feel that bite in the air that signals fall, make this apple crisp! Your friends and family will thank you, I promise!

Mom's Apple Crisp
*From my mom

6 cups peeled, pared, and sliced apples (8-10 apples-use Golden Delicious, Granny Smith, or Cameos; we use all Granny Smith because I love the flavor contrast between tart and sweet)
1 1/2 cups brown sugar, packed
1 cup flour
1 cup oats
1 1/2 teaspoons cinnamon
1 1/2 teaspoons nutmeg
2/3 cup margarine or butter, softened

 Heat oven to 375º. Grease 9x13 pan. Place apples slices in the pan. 


Mix remaining ingredients thoroughly and sprinkle over the apples.


Bake 30-45 minutes or until apples are tender and topping is golden brown. 


Serve with whipped cream or ice cream and cinnamon. Enjoy!

Monday, June 13, 2011

Slow Cooker Root Beer Pulled Pork


We have big news: We are having a little girl! Hubby is terrified and we're both excited. We have a couple of names picked out, but we won't be naming her until she is here. Now we're just preparing the nursery and making lists of all the baby stuff we need to buy-and there is a lot of it!

On to the recipe! I'm no longer meat-averse, but I am HATING all things chicken. Give me a steak or a roast any day, and I even ate a cheeseburger! I haven't had a cheeseburger in many, many years. This recipe, while not beef, was absolutely delicious. And it couldn't be easier. We started with a thawed roast, but next time I'll use a frozen one and cook it for longer. I really believe that low and slow theory is right on.

Slow Cooker Root Beer Pulled Pork

2+ pound pork roast (you can use tenderloin, butt, shoulder, etc.)
1 can or bottle of root beer (we used A&W, but you could also use Dr. Pepper or another brand)
1/2 teaspoon onion powder (or half an onion, thinly sliced)
1/2 teaspoon garlic powder (or 2 cloves garlic, finely minced)
Freshly cracked pepper, to taste
1 bottle of your favorite BBQ sauce

Place your roast, frozen or thawed, into your slow cooker. Rub onion powder, garlic powder, and pepper into the roast.


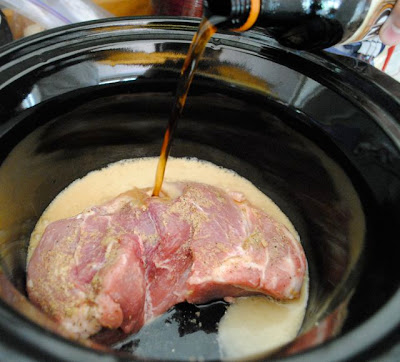
Pour your root beer all over the roast.


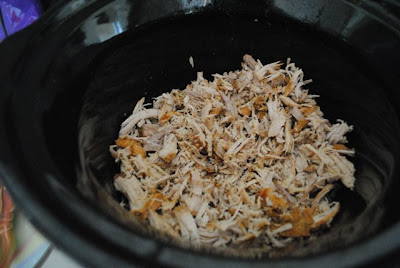
Cook on low 5-6 hours, or until the meat shreds easily with a fork. Remove the roast to shred it and pour the root beer mixture into a separate bowl. Return the dry shredded pork to the slow cooker.


Pour on your BBQ sauce and mix. We used a Memphis style, because that's what we had on hand, but we prefer Carolina style (more vinegary), so we added a little apple cider vinegar.


Test your pulled pork and add a little bit of the root beer mixture to taste. This will sweeten it up and thin it out a little bit. Serve it up on toasted hamburger buns with corn on the cob and enjoy!

Monday, May 9, 2011

Roasted Chicken


I am still experiencing a meat aversion, which, according to my doctor, is normal for pregnant women. I just hit 18 weeks and we find out the baby's gender on May 18th. Add that to my ever-growing stomach, and this whole thing is becoming more real by the day! Hubby and I keep asking each other what we got ourselves into, but we're very excited (along with terrified).

Anyway, back to the food. I have been feeling so guilty about only cooking vegetarian meals for Hubby and me, so today I decided to roast a whole chicken. My first one. Probably best to go for something a little less daunting when trying to get back into cooking, but hey, go big or go home, right? And I'm glad I chose this particular venture because the results were absolutely delicious! I have often gotten a whole roasted chicken from Fred Meyer or Costco and been pleased, but it is SO much better when you do it yourself at home. Not only does it taste better, but it also makes your house smell like heaven.

Now, with my meat aversion, Hubby ended up doing most of the prep work, but I supervised. When asked if he thought the extra work was worth it, he couldn't say because his mouth was full of chicken. He picked at the carcass for quite a while too, so I know it was good. This is a basic roasted chicken recipe, but it can certainly be jazzed up with additional herbs, onions, potatoes, lemons, etc. We liked the simplicity of it and the way the flavor of the chicken wasn't masked by seasonings, but to each his own, right?

Roasted Chicken
*From me!

1 whole chicken, about 4-6 pounds
Olive oil
Kosher salt
Pepper

Preheat the oven to 425º. Remove the chicken from the bag and pull out the giblets. Use tongs if the thought of sticking your hand up a chicken's rear isn't appealing to you. Rinse the chicken completely, inside and out. Pat dry with paper towels. Drying the bird will ensure that the skin is crispy.

Sprinkle on a generous amount of kosher salt.

Add freshly ground pepper to taste. This means LOTS for us!

Drizzle on a little bit of olive oil.

Beg your hubby to rub it in for you if you're pregnant and feeling nauseous when you think about touching the raw chicken. Or do it yourself if you're superwoman. (I am not, FYI).

Add more pepper, if so inclined. Or other herbs. This is also the point at which you might want to stuff a lemon up the chicken or add cut up onions or potatoes to the pan. Up to you. However you're going to do it, the chicken bakes for 85-90 minutes, depending on weight. Check the temperature of the bird with a meat thermometer when you think it's done, making sure to insert it away from any bones to get a true reading. You should also cut one of the legs to make sure the juices are running clear.

Once the chicken is done, carve and enjoy! We had ours with kale chips and sweet potato casserole.

It was delicious! Hubby has fallen in love with me all over again. He even called himself a meat whore. I didn't comment on the inappropriateness of the statement, but smiled indulgently and asked if he'd like more chicken. He screamed yes.