Showing posts with label fruit. Show all posts

Sunday, August 18, 2013

Blackberry Cobbler

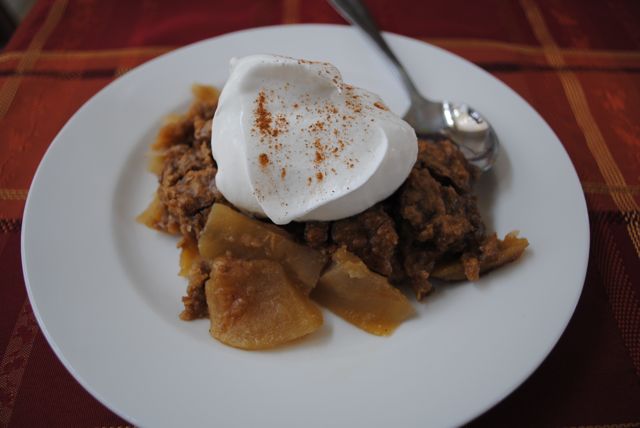
Blackberry cobbler and ice cream are the perfect combination!

I have a confession to make. I used to hate blackberries. My mom would make blackberry pie and I would turn up my nose. Too many seeds! Not sweet enough! I don't like pie! (To be completely honest, I still don't like pie very much. Crust is just really not my thing.) Maybe it was the seeds. Maybe it was the child labor involved to harvest the berries. Maybe it was the scratches from the thorns and the bee stings. I really don't know where the dislike started, but I have since changed my mind about blackberries. They are plump, juicy, and delicious, especially in this cobbler.

Hello, Delicious!

The cobbler topping on this was so good. We sprinkled some raw sugar (turbinado sugar) on top before baking, so the topping ended up soft and pillowy in the middle with a slightly crunchy top layer from the sugar. Perfection. The first time I made this, we used too many blackberries (7-8 cups instead of 6) and it didn't thicken up well. We made it again, and were careful to use only 6 cups of berries, and it turned out perfectly. This is a great summertime dessert-and a perfect Pacific Northwest treat!

Blackberry Cobbler
*Adapted from Tasty Kitchen

1 1/2 cups flour
1 1/2 cups sugar, divided
1 1/2 teaspoons baking powder
1 teaspoon salt
9 tablespoons cold, unsalted butter
1/3 cup boiling water
3 tablespoons cornstarch
1/3 cup cold water
1 1/2 tablespoons lemon juice
Zest from one lemon
6 cups fresh blackberries, rinsed and drained
1-2 teaspoons turbinado sugar

Preheat oven to 400º. In a large bowl, mix flour, 3/4 cup sugar, baking powder, and salt. Cut the butter in pieces and use a pastry cutter or two forks to cut it into the flour mixture, until it resembles coarse crumbs. Stir in the boiling water until the mixture is just evenly moist. Set aside.

In a large bowl, dissolve the cornstarch in cold water.  Add the berries, remaining 3/4 cup of sugar, lemon juice, and lemon zest. Transfer to a skillet and bring to a boil, stirring frequently. Allow to boil for about 5 minutes, or until it starts to thicken. Transfer to a baking dish (I used a 9x11 oval baking dish and it worked perfectly). Drop the dough on top by spoonful and sprinkle turbinado sugar over the top.

Bake 25 minutes, until dough is golden brown. Enjoy with a generous scoop of ice cream!
Yes, this smells as good as it looks!

Tuesday, February 28, 2012

Hubby's Favorite Apple Crisp

Somehow I didn't take a single picture of this recipe. Maybe that's because Hubby ate it so quickly. I, on the other hand, didn't eat any of it. This recipe was too sweet for me, but I've come to realize that I don't really like very sweet flavors. I love my mom's apple crisp, which I make with Granny Smith apples for that tart bite. I'm glad I used Granny Smiths in this recipe too, since it cut the sweetness a bit. Hubby declared this his new favorite apple crisp recipe. I guess next time I make it for him, I'll have to take a picture!

Hubby's Favorite Apple Crisp
*From Mommy's Kitchen

Filling:
4-5 apples, peeled and sliced (I used Granny Smith apples)
1/2 cup sugar
1 tablespoon cinnamon
1/2 cup apple cider or apple juice (I used about 2/3 of a cup)
1 teaspoon vanilla extract

Topping:
1 cup all purpose flour
1 cup sugar
1 stick cold margarine (not butter)

Preheat oven to 400º. In a small bowl, mix the cinnamon and sugar together. Add a single layer of cinnamon sugar onto the bottom of an ungreased 8x8 or 9x9 inch baking pan.

Layer sliced apples, sprinkling the cinnamon sugar mixture in between each layer. Make sure to use enough of the mixture to cover each layer.

Once the apples are to the top of the pan, cover with a final layer of cinnamon and sugar. Mix the vanilla extract and apple cider together in a measuring cup. Pour the apple cider mixture over the apples.

Using a pastry cutter or fork, blend the 3 topping ingredients together until crumbly. Cover the apples with the topping and bake for 25-35 minutes until golden brown and bubbly. Cool and serve.

Enjoy!

Thursday, January 26, 2012

Coconut Almond Granola


I have a hard time with snack foods. I don't want crackers, I want a steak or some leftover chicken noodle soup or pasta. Usually I reach for something a little more hearty than a handful of granola, but this is special granola. It has coconut and almonds, two of my favorite things. Add in some cinnamon (which you do!) and you've got yourself a yummy treat!

This recipe called for chia seeds, which I was all for using, but chia seeds are expensive! The brand is Bob's Red Mill and you can find them in the whole foods aisle. I didn't know if I would like the recipe, since I've never made granola before, so I didn't buy the seeds. A single batch of granola only calls for 2 tablespoons of chia seeds, which means a bag would last a long time. I might go buy the seeds for next time, since I'm sure I'll be making this recipe again and again. It's delicious, especially on Greek yogurt or even ice cream!

Coconut Almond Granola
*Adapted from The Vintage Mixer

3 1/2 cups coconut flakes, sweetened or unsweetened, depending on your taste
2/3 cup oats
1/2 cup almonds, chopped
2 tablespoons chia seeds (I left these out this time)
1 teaspoon ground cinnamon
1/3 cup coconut oil (mine was in solid form, so I heated it in the microwave until it liquified)
Dash of salt

Preheat oven to 350º. Combine all ingredients in a bowl and spread the mixture evenly onto a baking sheet. Bake for 15 minutes and then turn everything with a spatula. Spread it back out and cook for an additional 10 minutes or until just golden.

Cool, then store in an airtight container in the fridge for 3-5 days. This is good over ice cream, Greek yogurt, apple sauce, with milk, or just straight out of the jar!

Enjoy!

Friday, January 13, 2012

Pumpkin and Apple Soup

 Fall is my favorite season and I have a hard time giving up the flavors that go along with it. This soup is the perfect way to capture fall in a bowl and I loved the way it made the house smell. The best thing about this soup was that it tasted even better the next day. The hubby loved it too! It was also filling and easy to make, which makes this a great soup. This one is in our permanent file, especially considering the fact that I have most of these ingredients on hand all the time too!


Pumpkin and Apple Soup
*Adapted from Brown Eyed Baker

1 tablespoon olive oil
1 shallot, diced
2 Granny Smith apples, peeled, cored, and diced
3/4 teaspoon kosher salt
6 cups chicken stock
2/3 cup no sugar added applesauce
1/2 teaspoon ground white pepper
1/2 teaspoon ground sage
1/2 teaspoon dried thyme
1/4 teaspoon ground nutmeg
2 15-ounce cans pumpkin
1/4 cup brown sugar
1/2 cup cream
Fresh ground black pepper for serving

Heat a Dutch oven or large soup pot over medium heat. Add the olive oil and heat until it shimmers. Add the diced shallot, apples, and salt. Sauté until shallot is translucent, about 7 minutes. Add the chicken stock, applesauce, white pepper, sage, thyme, and nutmeg. Bring to a boil and until apples are very tender, about 5 more minutes.

Add the pumpkin and brown sugar and cook for 10-15 minutes over medium heat. Use an immersion blender to blend soup until it's smooth or use a blender to blend the soup in batches. Add the cream to the soup and heat through over very low heat. Add more cream or water if necessary to thin it out. Remove from heat and serve with fresh ground pepper as desired.

Enjoy!

Slow Cooker Cinnamon Applesauce


I love a recipe that makes the entire house smell like warmth and yumminess. I can achieve that with a great roast or baked dessert, but the best smell comes from any dish that includes cinnamon. This recipe for applesauce really sent the aroma of cinnamon wafting through our house. I was so excited to try this applesauce and it didn't disappoint!

This might be one of those recipes that I shouldn't mess with because it really was yummy as is, but I have a few changes I'm going to try next time. The first is switching out the white sugar for brown sugar. I'm also going to add nutmeg, cloves, and maybe a little bit of vanilla extract. I love that I have a great basic recipe though. I only wish it had made more! Once you mash it, the amount reduces by about half. Something to keep in mind for next time.
Emma helped Momma make applesauce! (Please ignore the clutter and mess in my kitchen. Having a baby and holiday time combine to make it impossible to keep my house clean!)

Slow Cooker Cinnamon Applesauce
*Slightly adapted from What Megan's Making

3 pounds of apples (6-9), peeled, cored, and cut into 1 1/2 inch chunks
1 cup apple cider or apple juice, plus more as needed
2 tablespoons sugar, plus more as needed
Pinch salt
2 cinnamon sticks (optional)
1/4-1/2 teaspoon cinnamon

Combine apples, cider or juice, sugar, salt, and cinnamon sticks in a slow cooker. Cover and cook on low until apples are very soft and beginning to disintegrate, between 3-4 hours on low. Remove cinnamon sticks if using. Mash with a potato masher or immersion blender to desired consistency. Season with cinnamon and additional sugar to taste and adjust consistency with additional hot apple juice or cider as needed.

*Recommended apples: Jonagold, Pink Lady, Jonathon, Golden Delicious, Rome, Mcintosh, Empire

*Not Recommended: Granny Smith, Red Delicious, Braeburn, Cortland, Baldwin, Honeycrisp, Norther Spy

Thursday, September 8, 2011

Mom's Apple Crisp


Well, Hubby and I have officially begun the countdown. Baby girl is due in about 4 weeks and we're hoping (praying, begging) that she is a little early because the end of this pregnancy has been far more difficult than the beginning. Of course, the sweltering heat this week doesn't make the swollen ankles and discomfort any better, but the end is in sight. I just have to keep telling myself that!

I made this recipe a long time ago and the photos have been sitting on my computer waiting to be put into a post. I confess that I haven't been all that inspired to write or do much of anything lately, but I have to share this one before fall is really upon us because this apple crisp begs to be made in the cool weather I know is just around the corner. This recipe is my mom's, but it's also in one of my Nana's old cookbooks, which is probably where Mom got it in the first place. Regardless, Mom's apple crisp is guaranteed to make you happy and make your house smell like heaven. It's very, very easy too and always a crowd pleaser. So, once you feel that bite in the air that signals fall, make this apple crisp! Your friends and family will thank you, I promise!

Mom's Apple Crisp
*From my mom

6 cups peeled, pared, and sliced apples (8-10 apples-use Golden Delicious, Granny Smith, or Cameos; we use all Granny Smith because I love the flavor contrast between tart and sweet)
1 1/2 cups brown sugar, packed
1 cup flour
1 cup oats
1 1/2 teaspoons cinnamon
1 1/2 teaspoons nutmeg
2/3 cup margarine or butter, softened

 Heat oven to 375º. Grease 9x13 pan. Place apples slices in the pan. 


Mix remaining ingredients thoroughly and sprinkle over the apples.


Bake 30-45 minutes or until apples are tender and topping is golden brown. 


Serve with whipped cream or ice cream and cinnamon. Enjoy!

Wednesday, December 1, 2010

Maple Chicken Breasts with Caramelized Apples

I cook a lot of chicken, so I know how difficult it is to make chicken taste interesting. Bland and boring describe a lot of chicken recipes, but not this one! I took a pork tenderloin recipe from Dinner with Julie and made it with chicken, which I prefer. The flavors reminded me of dishes we had while in Normandy. It was savory and sweet with a tartness from the apple, and the mustard gives it a great, but subtle, undertone of flavor. My favorite part of this dish, however, was the maple syrup. How can you ever go wrong with a dish made with real maple syrup? The answer: you can't!

Maple Chicken Breasts with Caramelized Apples
*Adapted from Dinner with Julie

1 tablespoon canola oil
1 tablespoon butter
3-4 chicken breasts
Black pepper
1 tablespoon fresh thyme leaves (or 1 teaspoon dried thyme)
1 tart apple, cored and sliced
1-2 teaspoons grainy mustard
2-3 tablespoons real maple syrup
1/2 half and half
In a large skillet, heat the oil and butter over medium-high heat. Sprinkle the chicken generously with pepper and thyme.
Cook chicken for about 5 minutes each side, or until no longer pink in the middle. Transfer to a plate and keep warm.
Sauté the apples in the pan for a few minutes, until they start to soften and turn a little golden. They will pick up some bits of chicken from the pan, which adds to the flavor.
Add the mustard and maple syrup to a bowl.
Mix in the half and half.
Add the mixture to the apples and stir. Simmer and let it thicken.
Pour the sauce over the chicken and serve. Enjoy!

Tuesday, November 16, 2010

Sourdough and Cornbread Stuffing


Our Thanksgiving meal always consists of the slightly soggy and sometimes gluey standard stuffing. It tastes fine, but it is no one's favorite. I set out to change that when I found this recipe from the Pioneer Woman. I changed it a little bit to fit our tastes and came up with a delicious final result. Hello new stuffing recipe!

Sourdough and Cornbread Stuffing
*Adapted from The Pioneer Woman

1 pan of cornbread (I used an 8x8 pan of homemade cornbread)
1 loaf crusty sourdough bread
1 stick butter
1 shallot, diced
2 Granny Smith apples; peeled, cored, and diced
4 cups chicken broth
1/2 teaspoon dried basil (I used 3 tablespoons chopped fresh basil)
1/2 teaspoon thyme
2-3 teaspoons fresh chopped rosemary
1/4 cup fresh chopped parsley
Salt, to taste

Chop up the cornbread and sourdough bread into 1-inch cubes. Toast in a 350 degree oven for 30-45 minutes or until slightly crispy, but not browned.

Melt butter in a large skillet over medium heat. When it's melted, add the shallot and apple and cook until the shallot is translucent, about 5 minutes. Add 4 cups of broth and bring to a boil. Add in the herbs and stir to combine.

Place dried breadcrumbs in a large bowl and gently mix. Add in broth mixture a ladleful at a time and gently toss to coat. Taste as you go to adjust seasonings. Salt carefully! You don't want to over salt your stuffing. If the breadcrumbs are still a little dry once you've added all the broth mixture, add more broth and stir.

Bake in a 350 degree oven for 20-25 minutes or until golden brown on top. Enjoy!

Friday, July 23, 2010

Apple Dumplings


This one came from Trisha Yearwood's cookbook Home Cooking with Trisha Yearwood and wow, it is amazing. And easy! It was delicious straight out of the oven with a little whipped cream. Then I took the leftovers to my parents' house and they re-heated the dumplings and added vanilla ice cream. My dad couldn't stop raving about these babies! He loved them and so do I. It was like eating your own personal apple pie and I will be making this again and again and again and . . .

Apple Dumplings
*From Home Cooking with Trisha Yearwood

2 Granny Smith apples
1 cup water
1 cup sugar, divided
1/2 cup (1 stick) butter (I used half a stick and it was still delicious)
1/4 teaspoon vanilla
8 canned buttermilk biscuits (the dough, not precooked)
4 teaspoons ground cinnamon

Preheat oven to 375 degrees. Peel, core, and slice the apples into 8 slices each. Cover with water to keep slices from turning brown.

In a medium saucepan, mix the water, 3/4 cup sugar, butter, and vanilla. Bring the mixture to a boil over medium heat.

Separate each biscuit into two layers. Wrap a biscuit layer around a slice of apple, stretching the biscuit slightly to overlap and seal on the bottom. Place the wrapped slices, seal side down, in a greased 9x13 casserole dish.

Pour the hot sugar mixture over the apple slices. Don't panic when it looks like a hot mess. It will be good, trust me. Mix the remaining 1/4 cup of sugar and cinnamon together and sprinkle on top of the dumplings.

Bake for 30-35 minutes or until golden brown. Serve with whipped cream or ice cream and enjoy!

3-Ingredient Fruit Gratin


This one caught my eye because it was so easy. And the creator gave it rave reviews. Overall, I liked the flavors, but I wanted something more. And it was horrible as leftovers. Not a good sign in our house. I like having this one on file for dessert in a pinch, but it won't be a regular on my recipe rotation.

3-Ingredient Fruit Gratin
*From Smitten Kitchen

2 cups berries (I used strawberries)
2 cups sour cream or créme fraîche
1 cup dark brown sugar
1/4 teaspoon vanilla extract (or lemon juice, almond extract, etc.), optional

Preheat broiler. Fold berries into sour cream and add vanilla. Pour in shallow 1-quart casserole dish.

Sprinkle brown sugar on top.

Place under the broiler until sugar just begins to caramelize. Eat right away.

Thursday, July 8, 2010

Caramel Apple Pie


What's more American than apple pie? I made this dish for the 4th of July and it was delicious. Sweet from the caramel sauce, tart from the Granny Smith apples, and a little spicy with the cinnamon and nutmeg. Add all that to the fact that it is pretty easy to make with a store-bought deep dish pie crust and you've got a real winner. I didn't take many photos because I was pressed for time, but trust me when I say this was GOOD!

Caramel Apple Pie

1 9-inch deep dish pie crust
8 Granny Smith apples, peeled and sliced thinly, about 1/4 inch thickness
1/2 cup unsalted butter
3 tablespoons all-purpose flour
1/4 cup water
1/2 cup white sugar
1/2 cup packed brown sugar
1 teaspoon cinnamon
Pinch nutmeg

For the topping:
1/2 cup flour
1/2 cup brown sugar
1/4 cup melted butter

Preheat oven to 425 degrees. Melt the butter in a saucepan over medium heat. Add in the flour to create a paste. Add water, white sugar, and brown sugar and bring it to a boil. Reduce the heat and let it simmer for five minutes. Meanwhile, place the apples in a large mixing bowl. Add cinnamon and nutmeg and toss. Pour apples into the pie crust. They will create a large mound, which will cook down. Add the caramel sauce, pouring slowly so that it doesn't run off. Make the topping by melting the butter and adding the flour and brown sugar. Mix to combine and sprinkle on top of the pie.


Bake for 15 minutes in a 425 degree oven. Reduce the temperature to 350 degrees and bake for an additional 35-45 minutes or until the apples are soft.

Thursday, June 24, 2010

Banana Cream Pie for Father's Day


When I asked my dad what he wanted for Father's Day, his response was: Banana cream pie. I've never made a pie from scratch before, but my dad was worth the effort. And it was an effort. For starters, our Pillsbury dough didn't make it through the baking process. I didn't push it high enough up the side of the pie plate and it slid down while baking. Round 2: send husband to the store for a pre-made crust. Unfortunately, I forgot to specify that I needed a deep dish crust. The crumb crust he brought home=no good. Thankfully, I remembered that I had a pre-made deep dish pie crust in my freezer, so I thawed that out and shoved it in the oven to cook. All of this occurred about an hour before we had to leave to go my parents' for their Father's Day celebration. Despite the fiasco, this was a delicious pie. My dad loved it and my Papa scarfed down a huge piece too. This one is definitely in my permanent file!

Banana Cream Pie

1 9-inch deep dish pie shell, baked
3 cups whole milk
3/4 cup white sugar
1/3 cup all-purpose flour
3 teaspoons cornstarch
1/4 teaspoon salt
3 egg yolks, slightly beaten
2 tablespoons butter
1 teaspoon banana extract
3 bananas plus one for decorating
Whipped cream

In a large saucepan, scald the milk. To scald milk means to bring it to almost boiling. But don't let it boil!

In a large mixing bowl, combine the sugar, flour, cornstarch, and salt. Gradually stir in into the scalded milk. Over medium heat, stirring constantly, cook until thickened. You'll know it's done when you lift the spoon and a thick coating remains. It will be the consistency of custard. Cover, and stirring occasionally, cook for two minutes longer. In a small bowl, have the 3 slightly beaten egg yolks ready. Stir a small amount of the hot mixture into the beaten yolks to temper. When thoroughly combined, stir the yolks into the hot mixture. Cook one minute longer, stirring constantly. Remove from heat and blend in butter and banana extract. Let the mixture sit until lukewarm.

When you're ready to pour, slice three bananas and scatter in the cooked pie shell. Pour the warm mixture over the bananas. Refrigerate until cool.

Top with whipped cream and sliced bananas before serving. Enjoy!

Thursday, June 3, 2010

Nana's Sour Cream Rhubarb Pie


Some of my favorite childhood memories include spending time with my Nana in her kitchen "helping" her cook. She always let me lick the beaters and whip the eggs with this spinning contraption (which is now sitting in a drawer in my own kitchen!). So many yummy dishes came out of her kitchen and I will always cherish those times I got to spend with her. She passed away in February 2008 and nothing is the same without her. But sometimes, just sometimes, you are able to capture a memory through something as simple as a recipe. This sour cream rhubarb pie was like sitting in Nana's kitchen eating pie with her. The pie brought it back for just a moment, but that moment was wonderful, especially for my mom. She thanked me for trying this recipe and bringing Nana back for that moment. Now, in tribute to Nana, who was always substituting things in her recipes (sometimes with good results and sometimes . . . well, velveeta fudge. And I'll leave it at that.), I didn't have enough rhubarb. So I substituted a cup of sliced strawberries for one of the cups of rhubarb. And it worked out just fine!

As for the pie, it was absolutely delicious. Of course.

Nana's Sour Cream Rhubarb Pie
Courtesy of Naomi Worthan, the best Nana ever.

1 unbaked pie crust
4 cups chopped rhubarb
1 egg
1 1/2 cups sugar
1 cup sour cream
1/3 cup all-purpose flour, plus 1/2 cup flour, divided
1/2 cup brown sugar
1/4 cup melted butter

Preheat oven to 450 degrees. Press the pie crust into a 9-inch deep dish pie plate. Spread the chopped rhubarb on the crust.

Whisk together the egg, sugar, sour cream, and 1/3 cup flour. Pour over the rhubarb.

Be careful not to overfill.

Combine the remaining 1/2 cup flour, brown sugar, and melted butter. Sprinkle over the top of the pie.

Bake at 450 degrees for 15 minutes. Reduce oven temperature to 350 degrees and bake another 40 minutes. The pie will puff up and the center might remain slightly jiggly. That's okay. Let it cool completely before serving.