Showing posts with label Nana. Show all posts

Saturday, November 12, 2011

Nana's Chili

Our good news: Hubby and I welcomed our little bundle of joy on October 14th at 7:39am. Her name is Emma Naomi after her great great grandma Emma and great grandma Naomi and we are ridiculously head over heels in love with her! Having a baby is the most amazing experience ever and, although I haven't forgotten the misery, I can't wait to do it again in a year or two. For now, we are just loving Emma and enjoying every second with her.

Now for the food! About a week after Em was born, I was really craving comfort food and this recipe wouldn't leave my mind. This is my Nana's (better known as Naomi!) recipe, so it was fitting that I make it to celebrate Emma's arrival. Nana may not have been here to welcome Em, but I know she was watching. Just eating her chili made it feel like she was close. And this is good chili. It's just spicy enough and full of goodness with lots of beans and delicious spices and flavor. I'm writing the recipe as we make it, which means that we don't dice the onion or green bell pepper and we don't sauté it with the ground beef. My dad hates onion and green pepper, but the flavor is necessary, so the onion goes in whole and the pepper is quartered. This is how I've always eaten it, so this is how I chose to make it. And it didn't disappoint. Comfort food in a bowl!

Nana's Chili
*From Naomi

1 pound ground beef
1 large onion
1 green bell pepper
2 tablespoons brown sugar
1/2 teaspoon onion powder
1/2 teaspoon garlic powder
1/2 teaspoon pepper
3/4 teaspoon salt
1 1/2 teaspoon basil
1 1/2 teaspoon oregano
2 teaspoons chili powder
1 teaspoon red pepper flake
1 can stewed tomatoes
2 cans tomato sauce
2-4 cans dark red kidney beans, drained and rinsed (I use 4 because the beans are my favorite part!)
1 large can tomato juice

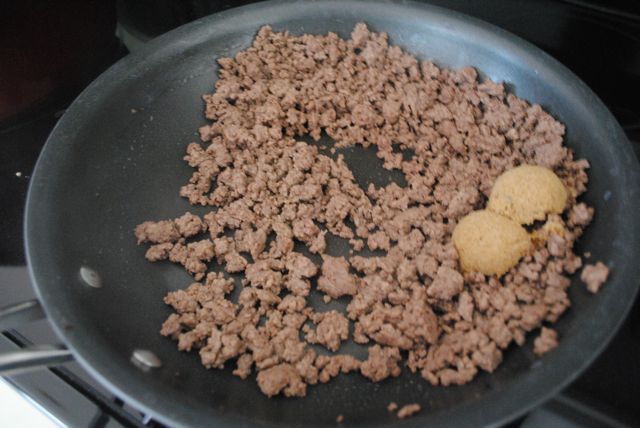
Brown the ground beef and season with garlic powder and onion powder. Drain the fat and add two tablespoons brown sugar. Stir.

Add the ground beef and then the other ingredients, except the onion and green pepper, to a large pot and stir.

Quarter the green bell pepper and remove the ribs and seeds. Peel the onion and add the whole onion and pieces of pepper to the chili and stir.
Cook on low heat for 3-5 hours (or all day in a slow cooker), stirring occasionally. Remove the onion and bell pepper before serving. Enjoy!

Thursday, September 8, 2011

Mom's Apple Crisp


Well, Hubby and I have officially begun the countdown. Baby girl is due in about 4 weeks and we're hoping (praying, begging) that she is a little early because the end of this pregnancy has been far more difficult than the beginning. Of course, the sweltering heat this week doesn't make the swollen ankles and discomfort any better, but the end is in sight. I just have to keep telling myself that!

I made this recipe a long time ago and the photos have been sitting on my computer waiting to be put into a post. I confess that I haven't been all that inspired to write or do much of anything lately, but I have to share this one before fall is really upon us because this apple crisp begs to be made in the cool weather I know is just around the corner. This recipe is my mom's, but it's also in one of my Nana's old cookbooks, which is probably where Mom got it in the first place. Regardless, Mom's apple crisp is guaranteed to make you happy and make your house smell like heaven. It's very, very easy too and always a crowd pleaser. So, once you feel that bite in the air that signals fall, make this apple crisp! Your friends and family will thank you, I promise!

Mom's Apple Crisp
*From my mom

6 cups peeled, pared, and sliced apples (8-10 apples-use Golden Delicious, Granny Smith, or Cameos; we use all Granny Smith because I love the flavor contrast between tart and sweet)
1 1/2 cups brown sugar, packed
1 cup flour
1 cup oats
1 1/2 teaspoons cinnamon
1 1/2 teaspoons nutmeg
2/3 cup margarine or butter, softened

 Heat oven to 375º. Grease 9x13 pan. Place apples slices in the pan. 


Mix remaining ingredients thoroughly and sprinkle over the apples.


Bake 30-45 minutes or until apples are tender and topping is golden brown. 


Serve with whipped cream or ice cream and cinnamon. Enjoy!

Wednesday, February 23, 2011

Nana's Famous Beer Roast


This roast is one that my mom makes at least a couple times a month. It is a favorite of the entire family and we always have it for family get-togethers. The original recipe comes from my Nana and there are many people who associate this dish with her, which makes it that much more special to me. One of the best parts about this roast (besides how delicious it is!) is the smell that wafts through the house as it cooks all day. By the time the roast is done, we're all standing around the stove salivating and counting the seconds. Well today, I finally attempted to make my Nana's famous beer roast. It was the 4-year anniversary of the day my husband and I met, so it was a special day. It has also been snowing on and off here all day, so a warm, comforting meal sounded perfect to us. I wasn't sure if I should post this recipe, since it feels like a sacred family dish, but it's too good not to share!

Nana's Famous Beer Roast
*From Nana and my Mom!

1 3-5 pound beef roast, (bottom round or chuck)
3 bottles of beer (we used Session, Hubby's favorite)
1 packet beefy onion soup mix (I grind the onions because I prefer a smooth texture for the gravy)
1 teaspoon onion powder
1 teaspoon beef bouillon
2 tablespoons Worcestershire sauce
1-1 1/2 teaspoons pepper
Preheat oven to 250º. Place the roast in a Dutch oven. Add onion powder, beef bouillon, and pepper.
Pour on the beefy onion soup mix and the Worcestershire sauce.
Add the beer.
Cover and cook for 6-8 hours. The meat will fall apart when it's done.

For the gravy:
Remove the meat from the cooking liquids and wrap in foil and set aside. Place the Dutch oven with the liquids on the stove over medium-high heat. In a small cup, add 1/4 cup cornstarch and an equal amount of water. Mix well until all lumps are gone and whisk into the cooking liquids. Heat to bubbly until the gravy thickens. You might need to do the cornstarch slurry more than once to thicken it enough. (I usually wind up doing it twice.)

Serve the gravy over mashed potatoes or rice and make sure to cover your meat with it too. Enjoy this wonderful family dish!

Thursday, January 20, 2011

Cinnamon Swirl Cake

I love all things cinnamon. For me, the sweetness of sugar isn't necessarily a craveable thing, but the bite of cinnamon is something I physically need. Seriously. And go figure, I would desperately crave cinnamon when the hubby is sick, so I spent most of second half of the day baking this cake while he was in bed moaning and groaning about his tummy. (I say that like he's being a big baby because I like to tease him, but really Hubby is a trooper when he's sick.) Anyway, back to the food. This cake is rich, completely unhealthy, and very yummy. I think my only change would be to the basic cinnamon frosting I made for it. Next time, I will use a cream cheese glaze so that the frosting doesn't overpower the cake.
Oh, I used my Nana's bundt pan to make this recipe.
I had an overwhelming sense of her being tickled to see me use it, just like I feel whenever I use one of her old pans. She would be so happy to see me cooking like I am! And she would have loved some of these recipes. I miss her so much.
Cinnamon Swirl Cake

Cake:
2 1/2 cups flour
1 teaspoon baking powder
1/2 teaspoon baking soda
1/2 teaspoon salt
1 cup butter, softened (2 sticks)
2 cups white sugar
4 eggs
1 teaspoon vanilla extract
1 cup sour cream

Swirl:
2 tablespoons cinnamon
1 cup brown sugar

Cinnamon frosting:
2 cups sifted confectioner's sugar
1/2 cup butter (1 stick), softened
1 tablespoon cinnamon
1 teaspoon vanilla extract
2 tablespoons milk
Preheat oven to 325º. Grease and flour a bundt pan. Sift together the flour, baking powder, baking soda, and salt. Set aside. Combine cinnamon and brown sugar for the swirl and set aside.
Cream together the butter and sugar until light and fluffy. Add eggs one at a time, beating well with each addition.
Stir in vanilla.
Add in sour cream and flour mixture, a little at a time. Mix just enough to fully incorporate the flour.
Spread half the batter into into the prepared bundt pan.
Sprinkle cinnamon and sugar mixture into the pan, leaving only a small amount for the top.
*Next time I will sprinkle a small amount of the cinnamon mixture into the bottom of the bundt pan first and then add the rest to the middle, as the bottom of the bundt pan is actually the top of the cake.
Add the rest of the batter.
Top with any remaining cinnamon mixture. Bake for 60-70 minutes or until a knife inserted in the cake comes out clean. Allow to cool for 10 minutes before inverting the pan.
For the frosting: Cream together butter, sifted confectioner's sugar, cinnamon, and vanilla.
Add in milk, 1/2 tablespoon at a time, until you reach the desired consistency. Beat until fluffy. Top the warm cake with frosting and serve.
This is also delicious heated up with your morning coffee! Enjoy!

Wednesday, December 29, 2010

Mom's Red Beans and Rice

Some recipes are best labeled as family traditions and this is definitely one of them. My mom always makes this after we have ham because it's the best and most delicious way to use up those leftovers. The original recipe for this dish came from a plate my Nana had and we haven't changed it in all the years it's been made, with one exception: Mom and I add red pepper flakes. It just isn't red beans and rice if it isn't spicy, right? So, my suggestion to you if you have leftover ham from Christmas: make this. Make it now! And serve it with cornbread. You'll love it, I promise!

Mom's Red Beans and Rice
*From Nana and Mom

1 pound red beans
1 quart water (32 ounces)
1/4 cup celery leaves (just cut off the tops of a bunch of celery and chop)
1 teaspoon salt
1/2 teaspoon tabasco sauce (a couple of shakes)
2 teaspoons red pepper flakes
1 onion (or sub 1/2-1 tablespoon onion powder)
2 cups chopped or shredded ham

Place beans in water and soak overnight or until the beans have expanded. Remove all unexpanded beans and place the rest in a large pot or dutch oven. Pour in the water and add onion or onion powder.
Add tabasco sauce.
Then add red pepper flakes.
Stir in salt and add the chopped celery tops.
Finally, add in the ham.
Stir well and simmer on low heat for 2 hours, stirring occasionally, or until beans are softened.
With a potato masher, mash the beans until the mixture is thickened. If it seems too thick, add in a little more water.
Cook on low heat for another 1/2 hour or until you're ready to eat, stirring occasionally to make sure it doesn't burn. Serve over white rice with cornbread and enjoy!

Thursday, December 16, 2010

Milk Chocolate Fudge

I have a story about fudge that I just have to share. My Nana, who was an amazing woman, by the way, loved to make "goodies" for the grandkids. She wasn't one to always follow the recipe, especially if she could "substitute" something in place of an ingredient she didn't have on hand. She also liked to try new and different recipes, something I seem to have inherited from her. However, I would have never had the guts to try Velveeta fudge. Yep, chocolate fudge made with Velveeta cheese. It was not good. You could definitely taste the cheese, but we smiled and tried it and told her it was interesting. (You didn't say you liked it or she would make 5 pans of it just for you because she loved you so much-a lesson I learned when I told her how much I liked her cherry cheesecake.) Nana was the very best grandma ever and I miss her all the time, but I always smile when I think of her fudge mishap.

My own history with making fudge has also been a little rocky. I seem to do an okay job with flavor, but I've had a hard time getting it to set up and then forget about getting it out of the pan. When I saw that this recipe didn't require me to use a candy thermometer, I was really excited to try it. And it didn't disappoint! The milk chocolate flavor is great and the wax paper trick made it easy to get out of the pan. Next time I will probably try it with bittersweet chocolate because I prefer that flavor to the more sugary milk chocolate, but regardless of my personal preference, this is great fudge!

Milk Chocolate Fudge

4 cups sugar
1 can evaporated milk
1 cup salted butter (2 sticks)
2 4.4-ounce Hershey's chocolate bars
1 11.5-ounce package milk chocolate chips
1 7-ounce jar marshmellow creme
Pour the sugar, evaporated milk, and butter into a large saucepan. Stir it all together over medium-high heat.
Bring it to a boil while you continue stirring. Once the mixture has reached a hard boil (this means it keeps boiling while you are stirring), continue cooking for 5 minutes, stirring constantly.
Remove the pan from heat. Stir in chocolate bars, chocolate chips, and marshmellow creme. Mix well to ensure that all ingredients are completely combined.
Pour the fudge into a buttered 9x13 baking dish (or a baking dish lined with wax paper). Let the fudge set and cool for one hour.
Cover with plastic wrap and store in the fridge until you are ready to cut it. Remember to keep it store in a tightly covered container so it doesn't dry out. Enjoy!

Monday, December 13, 2010

Nutella Chocolate Chip Cookies


I had a bad start to my relationship with Nutella. When I was a freshman in college, my RA was this really annoying hippie chick who didn't do a good job of keeping the peace in any way. I hate to see someone in charge who is ineffective, which is the reason I didn't care for her (it wasn't the hippie chick stuff, in other words). She would invite the girls in my hall to her room for Nutella and pretzels, which I refused to eat (I'm the passive-aggressive type, I guess-No, I will NOT eat your stupid hazelnut spread! I'm just going to sit here and pout and assume you know that I dislike you because of it! Yep, glad I grew out of that behavior.). So, to make a long story short, I hated Nutella because it always made me think of that girl. Fast forward to our trip to France. Nutella on everything! Crepes, croissants, a spoon . . . Yep, it's really good! So here's a cookie recipe that uses Nutella. The Nutella gives it a delicious flavor with a bit of a saltiness that goes perfectly with the sweetness of the batter and the chocolate chips. This one is a YUM!
Nutella Chocolate Chip Cookies

1 1/3 cups flour
1 tablespoon unsweetened cocoa powder
1/2 teaspoon cinnamon
1/2 teaspoon salt
1/4 teaspoon baking powder
1/4 teaspoon baking soda
8 tablespoons (1 stick) butter, room temperature
2/3 cup granulated sugar
1/3 cup packed light brown sugar
2/3 cup Nutella
1/2 teaspoon vanilla extract
1 large egg
1/2 cup semi-sweet chocolate chips
Sift together flour, cocoa, cinnamon, salt, baking powder, and baking soda. Set aside. (See my sifter? It was my Nana's!)
Cream together butter and both sugars until light and fluffy.
Mix in Nutella and vanilla extract. Mix in the egg.
Add flour mixture and mix until just incorporated. Add chocolate chips. Cover and chill for at least one hour.
Drop tablespoons of dough 2 inches apart on a parchment or silicone baking mat lined baking sheet. Bake at 350º for 11 minutes, or until the edges look set. Cool on the baking sheet for 4-5 minutes.
Then carefully transfer to cooling racks.
Enjoy!